
|
|

We Ship Worldwide! 

Secure Shopping Cart by Excellent eBay feedback! 
|
Write-up: Suspension Install (Ground Control Coilovers and KYB AGX Shocks)I have never done any suspension work before and I consider myself a total noob when I am working on my car. So if I can do it, then anybody can. I did this over a span of 2 days and about 5 hours each day. I will explain in as great detail as I possibly can so it won't take as long for the people who will attempt this after reading my "walk-through." *Disclaimer: I do not take any responsibility for anyone who does this install after reading my guide. Most work done on a car is dangerous and every precaution should be taken to avoid accidents. Tools needed: 1). Torque wrench, I got one from AutoZone's loan service (~$70). 2). Spring Compressor, again I got this from AutoZone's loan service (~$40). 3). Floor jack HIGHLY recommended. 4). 14mm, two 17mm, 19mm (for AutoZone's spring compressor) sockets. 5). 8mm and 14mm wrench. 6). Some sized hex key thing for the top of the stock struts. 7). Hammer. 8). Disposable gloves for clean hands. =) 9). Dremel (rotary tool) with cutting disk. 10). Scissors. Directions: Front: 1). Loosen the nuts for the front-driver-side-wheel, jack up the car, and take the wheel off.2). Use a 14mm socket and take the bolt, circled in red, off. (When installing the new shocks, this bolt needs to be tightened to 40lb/ft). 
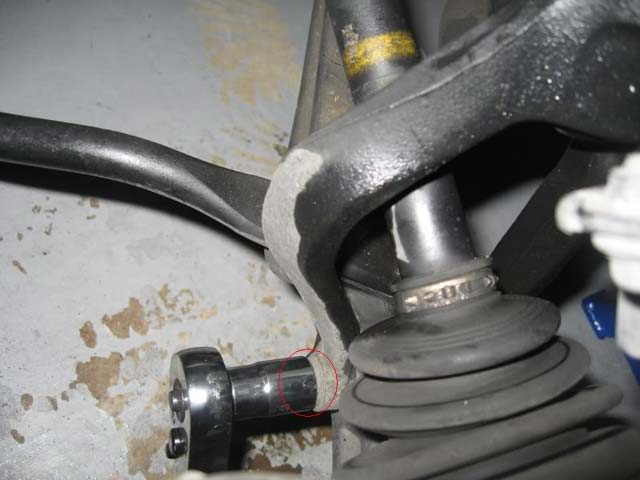
3). Use one 17mm socket on the circled bolt in the first pic and use the second 17mm socket on the circled nut in the second pic. (When installing the new shocks, this bolt needs to be tightened to 47lb/ft). 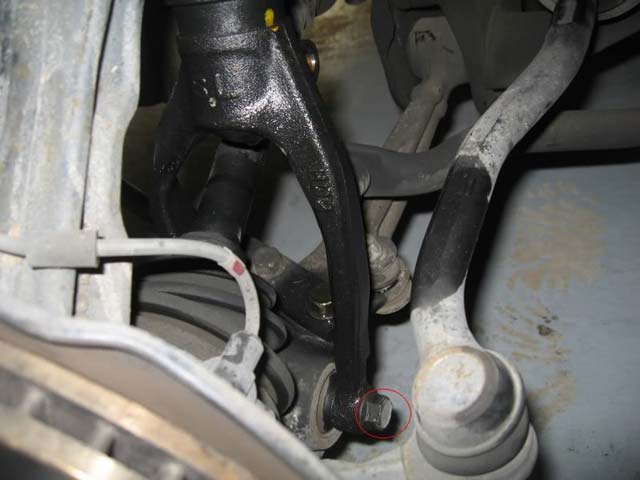
4). Open the hood and take the three circled nuts off using a 14mm socket, but obviously the nuts on the driver's side. Sorry for using the wrong sided pic. (When installing the new shocks, these nuts need to be tightened to 28lb/ft). 
5). You need to "pry" the upper arm so the shock can come out. I used the stock jack that came with the prelude and placed it on top of the upper arm and "jacked-it-up." This caused the arm to come down. 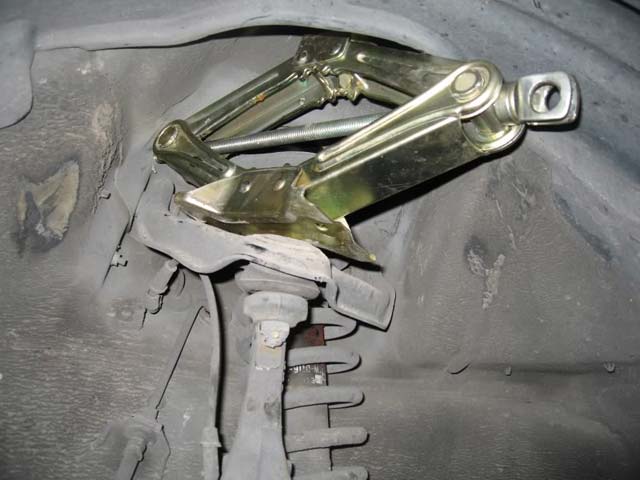
6). Jack it enough so you can take off the fork completely and have space to pull off the shock. Pull the shock through the caliper side; I made the mistake and pulled it off the other side. =( 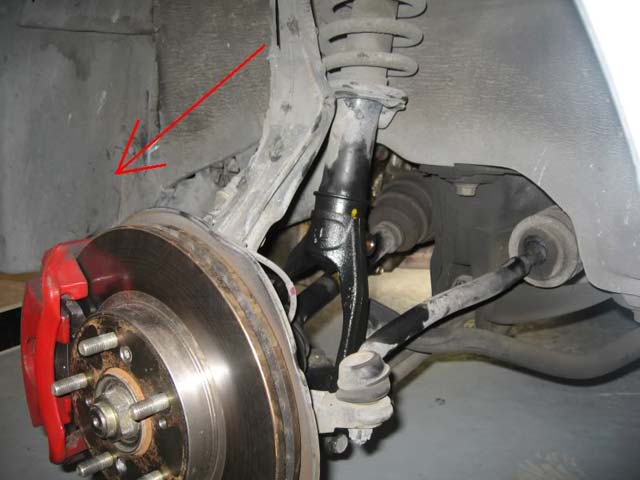
7). Put the spring compressors on and compress the spring. Use the 19mm socket to tighten the spring compressor if you are using the AutoZone compressor. Once you have compressed the spring enough, there should be some space created at the bottom of the spring. Using the hammer, bang where arrows are pointed so the spring will come down and not be underneath the end cap. 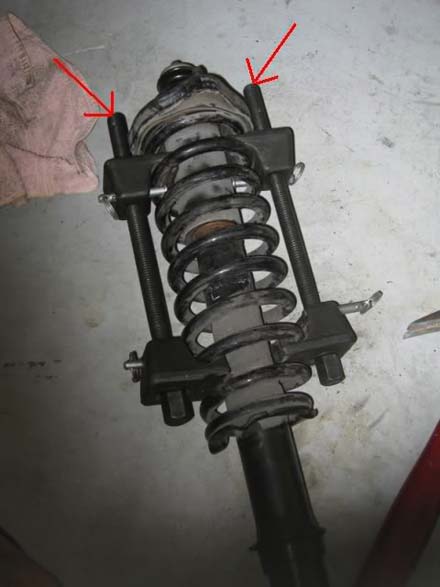
8). Make sure there is no tension in the spring and use the 14mm wrench and the hex key to take off the top nut on the assembly. This is the pic I borrowed from JLUDE. 9). Take apart the whole assembly and remember the order of all the washers. I took mine out and I DIDN'T HAVE ANY BUMP STOPS!!! 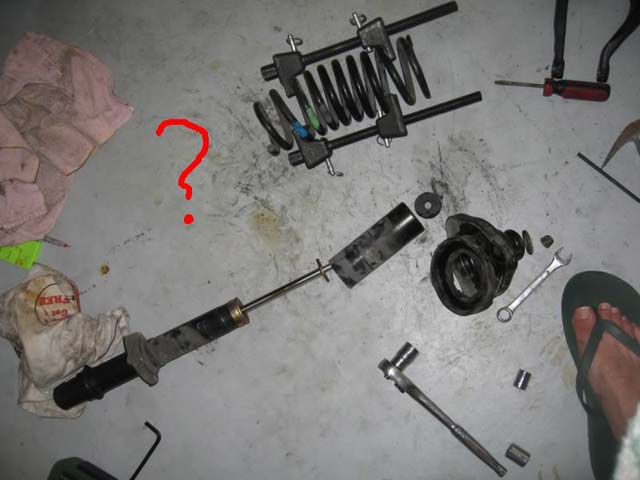
Here is a comparison of the stock stuff and the new stuff: 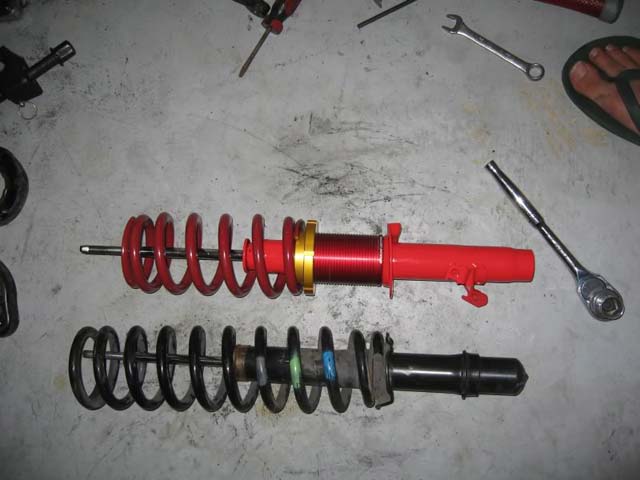
10). Use the dremel (rotary tool) and cut the metal dust-boot 2.25" from the top and keep the top portion. 
11) Follow the pics to assemble the shocks =] (the following pics, except the last one, are from the rear shocks cause I had some stuff wrong in the pics for the front shocks). I placed one skinny-o-ring on at the bottom, I don't think it is necessary but I did it anyways. =) 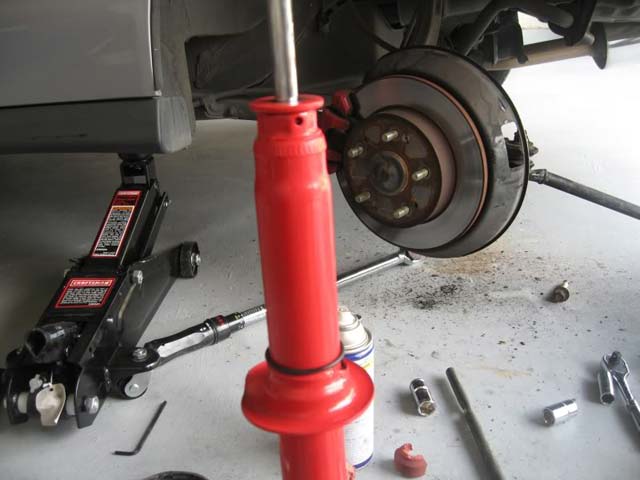
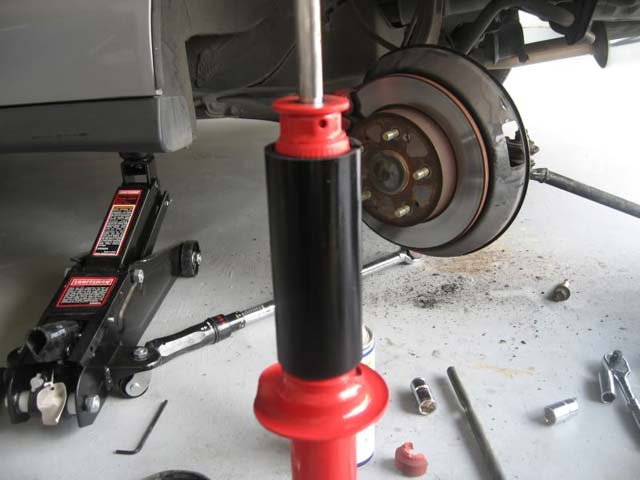
You are supposed to cut the bump stops in half, I didn't do it because it seemed that my new bump stops seemed pretty small as it is. 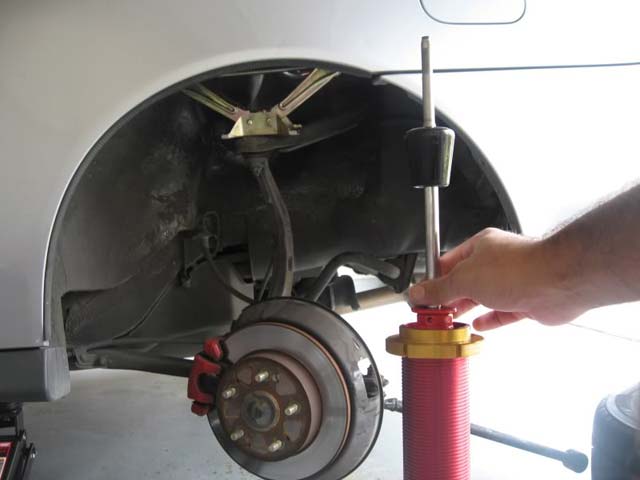
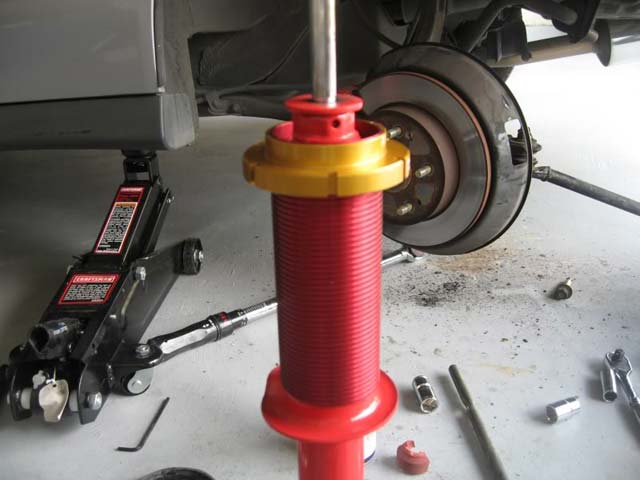
Put the dust boot on and put the washer over it. 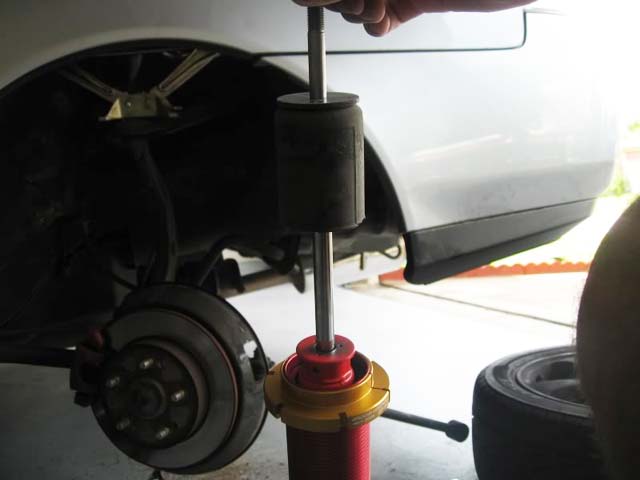
Rotate the perch down to the lowest setting and put the spring in. Place the rubber hat thing that came with the ground control on the top. 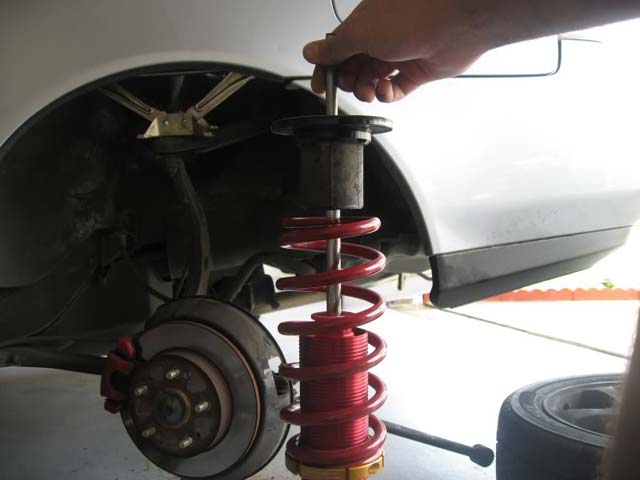
Take the old rubber hat thing off from the bottom of the end cap and place the end cap on the top. Place the washer concaved-up on top of that. Use the big nut that came with the AGX shocks and place it on the top and tighten it as much as you can, you need a 14mm socket/wrench for this. 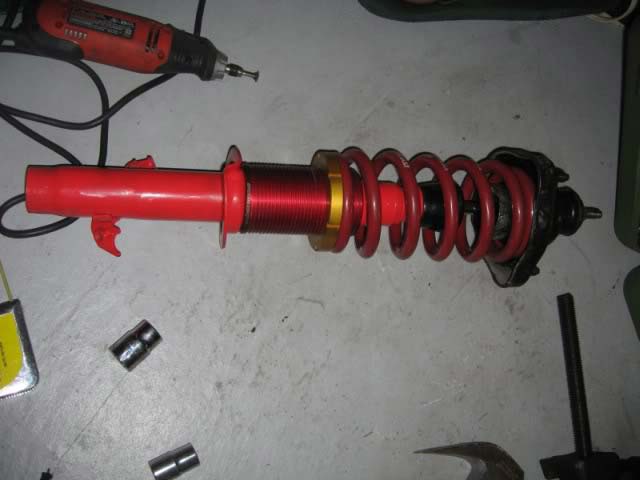
After you finish the assembly, rotate the perch up so the spring is snug and not moving (you can adjust the height later after you have installed everything, I only did this so the spring compressor won't be required in the assembly). 12). Place the assembled shock in reverse order of how you took it out and repeat for the passenger side. 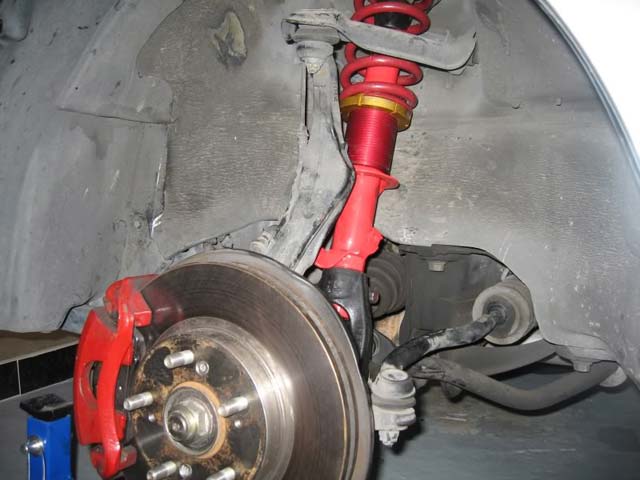
*Put the wheel back on, hand tighten the nuts, lower the car off the floor jack, and using a 19mm socket, tighten nuts in a star fashion to 80lb/ft. Rear: 13). Loosen the nuts for the rear-driver-side-wheel, jack up the car, and take the wheel off.14) Open the trunk and use a 14mm socket to take off the two circled nuts. (When installing the new shocks, these nuts need to be tightened to 28lb/ft). 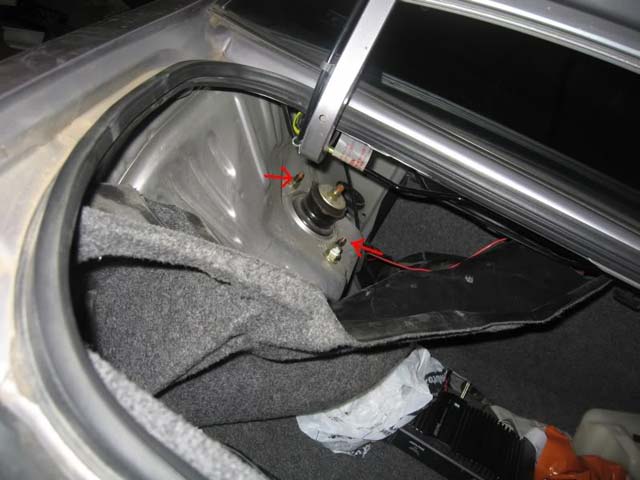
15) In the rear, the fork is attached to the shock and the nut is welded on the fork. Use a 17mm socket to take off the bolt from the fork. Sorry, but I forgot to take a pic of this. (When installing the new shocks, this bolt needs to be tightened to 47lb/ft). 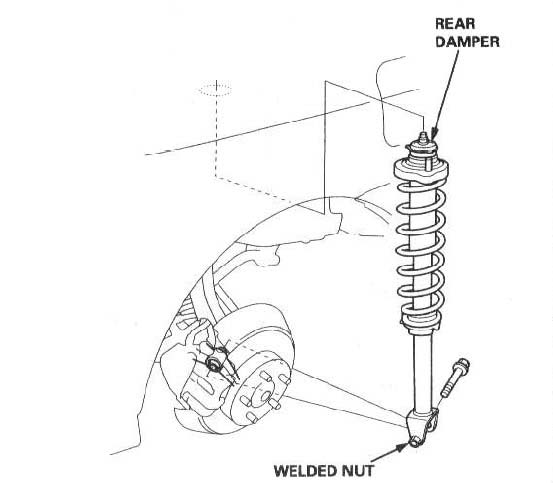
16). Use the same method with the stock jack to "jack-up" the top control arm. Jack up enough so the fork part of the shock will come lose. 17). You need to take off the bolt furthest away from the rotor for the lower arm to get the shock out. So use a 14mm socket and place it on the bolt (side facing the front of the car) and use a 17mm socket and place it on the nut (side facing the rear of the car). (When installing the new shocks, this nut needs to be tightened to 40lb/ft). NOTE, JLUDE posted the following comment: I needed to comment on this write-up. I would recommend to NOT DO STEP 17! If you remove that nut you lose your toe alignment settings! Instead remove the two nuts from the trunk side that hold the upper control arm to the car and swing the entire upper control arm, ball joint and hub out of the way enough to allow the spring/shock to clear! 
18). Push the lower arm down and away from the front and take out the shock from the side of the lower arm. 19). Disassemble the shock exactly like before. Here is a comparison of old vs. new. 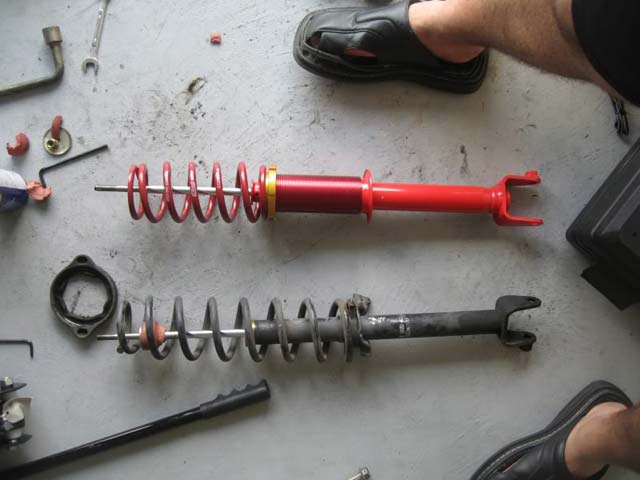
20). Use the scissors to cut the rubber part of the dust boot and keep the metal part. 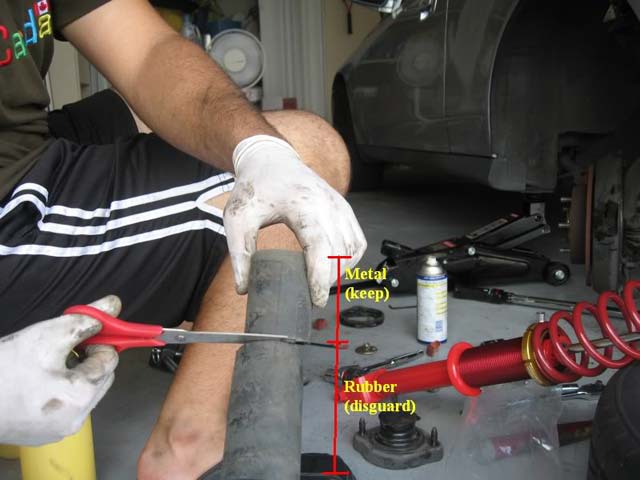
21). Reassemble the new shock/coilovers exactly like the front. 22). Place the shock back into place and put the bolt through the fork. Put the lower back in place and put the nut and bolt through it. Lower/take off the stock jack off the upper control arm. Put the two nuts in the trunk. 23). Put the wheel back on, hand tighten the nuts, lower the car off the floor jack, and using a 19mm socket, tighten the nuts in a star fashion to 80lb/ft. 24). Repeat for the passenger side. 25). Adjust the height to what you want and remember to tighten hex screw on the perch when you are done. According to KYB, you are NOT supposed to drop more than 1.5" compared to stock. My drop is about 1.25" front and back. Also, take this time to adjust the stiffness levels on the shocks themselves; use the screw driver that came with the shocks and PUSH IN and TURN to desired settings. I currently have mine to 2 in the front and back. 26). I forgot to do this while the shocks were out but it is ok to do it now. Tighten all 4 shocks using a 14mm wrench on the nut and use the 8mm wrench on the strut. Tighten it as much as you can. 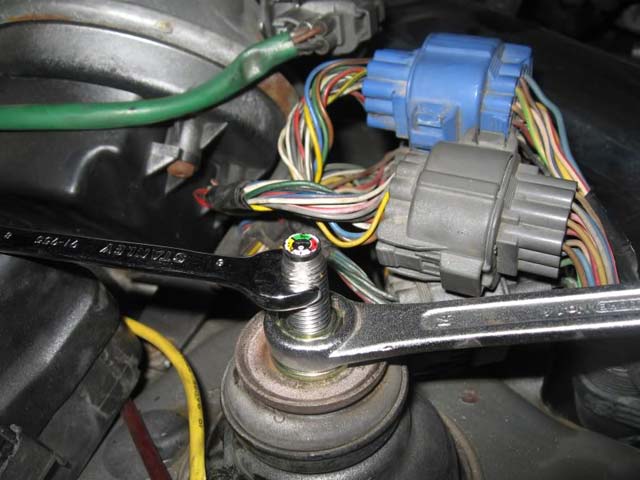
Here is a before pic: 
And couple of after pics: 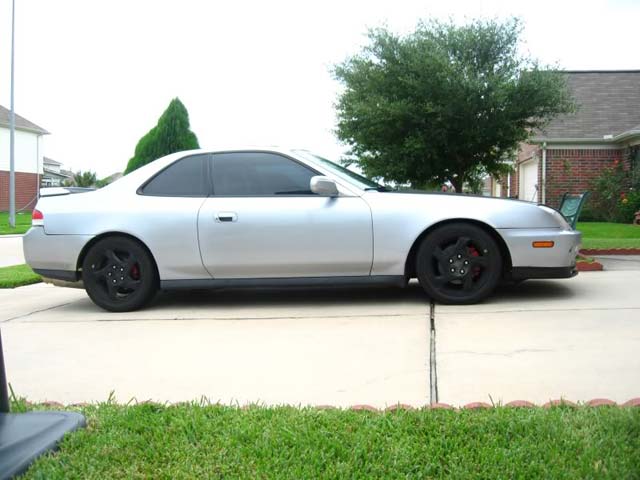
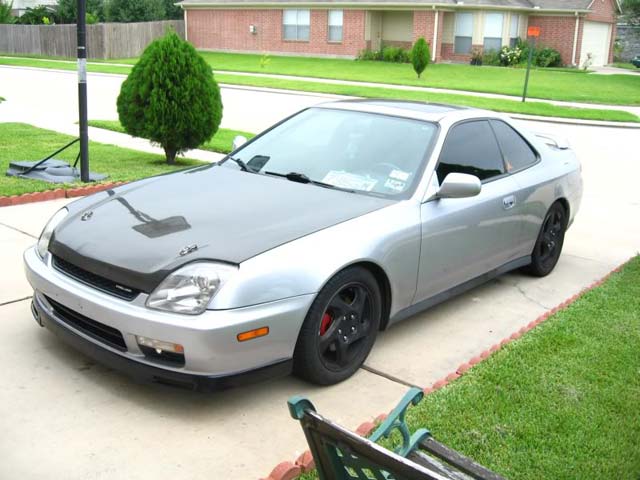
I know I know, my wheels are on backwards. When I got my alignment/balancing done, they put the wheels on like that. =( Any comments, questions, suggestions are always welcomed. =] |
Store 
Engine 
Exhaust 
Exterior 
Interior 
Misc. 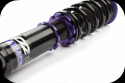
Suspension 
Wheels |
|
About Terms Privacy Contact
Copyright © 2007-2025 - eXtremePrelude.com - All Rights Reserved. |