

We Ship Worldwide!


Secure
Shopping Cart by

Excellent eBay feedback!


|
How to: Bypass AFBS Amplifier (Acoustic Feedback System)
This is for all of you who have aftermarket head units and would like the rear speakers to sound better.
First, let's discuss how it works. The Acoustic Feedback System is a 2-way, self-checking process. The head unit sends the signal to the speakers. The speakers produce sound. The microphone built into the stock speakers takes that sound and sends it back to the head unit. The head unit listens to the sound and alters the output to correct what it heard. The idea is to get better sound quality by reducing hiss, feedback, etc.
Now, let's discuss how/why bypassing it is better. AFBS only functions if you have the stock head unit AND stock speakers. Some might argue that (one name comes to mind). I don't care. So if anything is aftermarket in your audio system, you might as well bypass it. The reason is that the "amplifier" box used actually reduces the speaker output, at least once you have aftermarket goodies in there.
So, back story: When I first got my Lude (6 years ago), I replaced the stock head unit, stock rear speakers, and blown aftermarket door speakers (but not tweeters as they were already disconnected). Upon installation, I noticed that in order to hear the rear speakers, the fade setting had to be put almost all they way back. This reduced the total volume output of the system, which required the volume knob to be turned to max just to get a good listening level. BAD. About 2 years ago I again replaced the head unit, and this time I replaced all 6 speakers with 8 new component speakers, 6.5" woofers with 1" tweeters (Pioneer TS-A1702C for front AND rear). Again, the fade had to be set almost all the way back and again the volume wasn't loud enough. I realized the AFBS was the problem. After completing the following steps, I found that the rear speaker output increased approximately 600-800%.
So here we go.
Tools needed:
1 - Light Source (trunk light isn't enough)
1 - 8mm socket and ratchet
1 - 3" ratchet extension
1 - Wire strippers
4 - Wire butt connectors
4 - Speaker wire clips
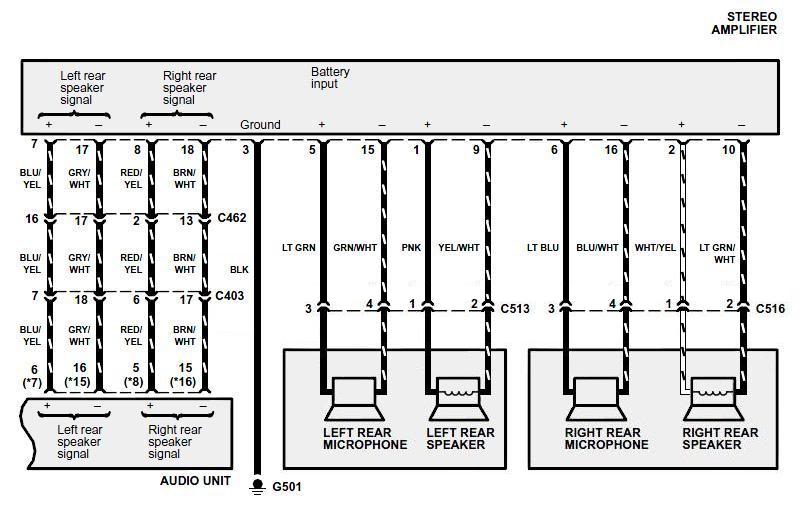
1 - Wiring diagram (see below)
Step 1: Download and print this diagram (click to enlarge).
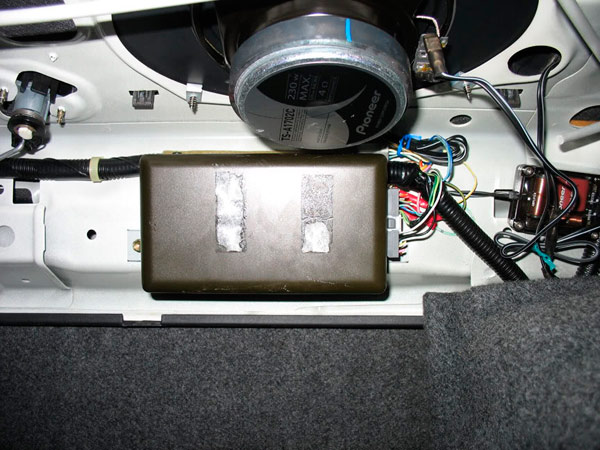
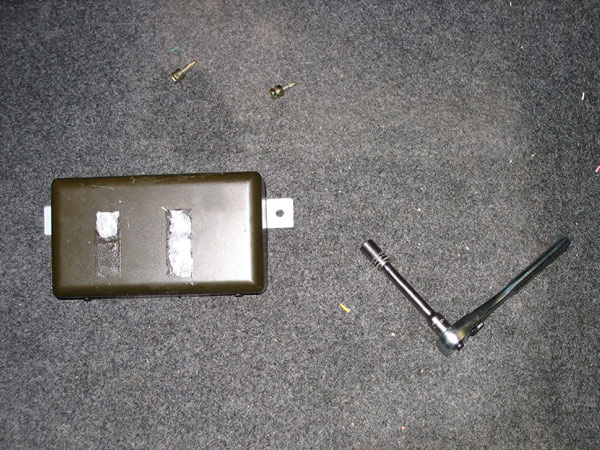
Step 2: Unplug and remove the "amplifier" box.
Step 3: Cut the 8 OUTSIDE wires on the plug (4 on left, 4 on right).
Step 4: Reconnect wires according to the diagram. To make it easier, here's how they go.
LR+ Blue wire w/ Yellow stripe (pin7) to Pink wire (pin1)
LR- Gray wire w/ White stripe (pin17) to Yellow wire w/ White stripe (pin9)
RR+ Red wire w/ Yellow stripe (pin8 ) to White wire w/ Yellow stripe (pin2)
RR- Brown wire w/ White strip (pin18 ) to Light Green wire w/ White stripe (pin10)
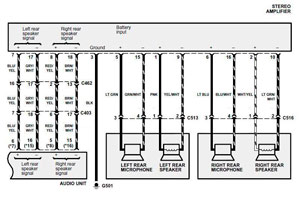
It should look something like this.
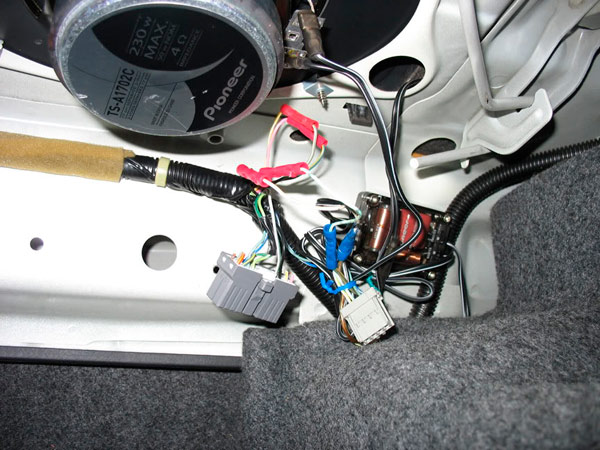
Step 5: Locate the 4-pin connectors for each speaker.
Step 6: Cut them.
Step 7: Attach speaker clips to correct wires. To make it easier, here's how they go.
LR+ Pink wire ~> Big speaker clip
LR- Yellow wire w/ White stripe ~> Small speaker clip
RR+ White wire w/ Yellow stripe ~> Big speaker clip
RR- Light Green wire w/ White stripe ~> Small speaker clip

Step 8: Connect speaker wires (with clips) to aftermarket speakers.
Step 9: Set your fade back to even and enjoy.
--- This how to courtesy of Kronn 98SH ---
|
Store
Engine
Exhaust

Exterior
Interior

Misc.
Suspension
Wheels
|