eXtremePrelude


Instagram

Facebook

Twitter


We Ship Worldwide!

Paypal Logo

Venmo Logo

Apple Pay Logo


Secure
Shopping Cart by
Mals-ecommerce shopping cart


Excellent eBay feedback! eBay feedback
eBay feedback


How to: Use JDM Fogs with USDM Switch

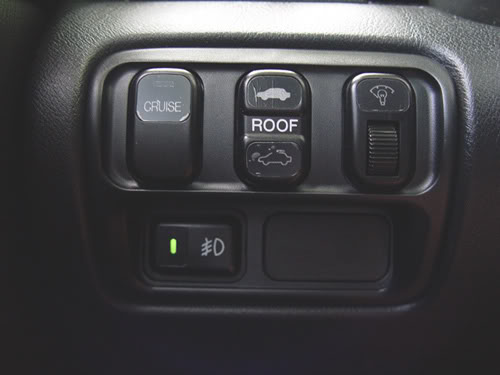
A disadvantage of installing the JDM fog light kit is that you sacrifice one of the switches in the three switch cluster. Most common is eliminating the dimmer control.

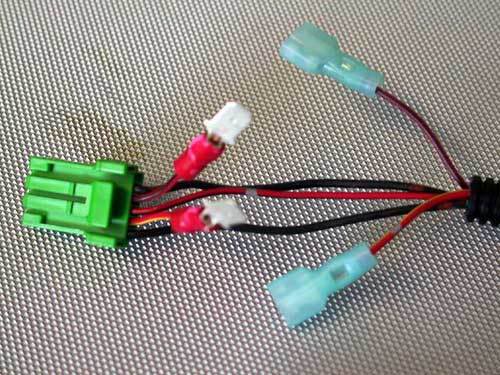
With this "How To" you'll replace the factory switch holder with the switch holder that is provided in the USDM fog light kit. The JDM fog switch will also be replaced by the USDM switch. You do not need to purchase the USDM fog light kit for this modification, only certain components.

JDM fog light switch to USDM switch conversion:

This conversion is for the fifth generation Honda Prelude. It facilitates the use of a USDM fog light switch and bezel with the ever popular JDM fog lights and wiring harnesses; which allows one to not lose the use of a switch as using a JDM switch requires. This modification assumes that you have already installed your JDM fog lights, JDM exterior and interior harnesses. This method is by far the simplest method to modifying your JDM interior harness. This method will also allow one to easily revert back to using the JDM switch. It took longer to create these instructions than performing the modification. Should take about 10 to 15 minutes.

One drawback is that the green fog lamp indicator on the USDM switch will be on when the switch has power going to it. In other words the indicator lamp will show when the fog lights have the power capability to turn on rather than showing that the fog lights are actually on. So if you selected your fog lights to have the ability to turn on when you turn the ignition to the on position (accessory connection #1), the indicator will come on at that time. It is better to have your fog lights and indicator light come on when the parking and dash lights are on (accessory connection #2).


Parts and Materials Required:
  • USDM fog light switch 08V31-S30-1M009
  • USDM switch holder 08V31-S30-100R2
  • USDM switch blank cover 08V31-S30-100R3
  • Two male spade or bullet connectors (Red = 18-22 awg)
  • Two insulated female spade or bullet connectors (Red = 18-22 awg)
  • Electrical tape

Tools Required:
  • Flathead screwdriver (-)
  • Phillips screwdriver (+)
  • Wire cutter or strong sharp scissors
  • Wire stripper
  • Wire crimping tool sharp knife or rotary tool
  • Shop towel

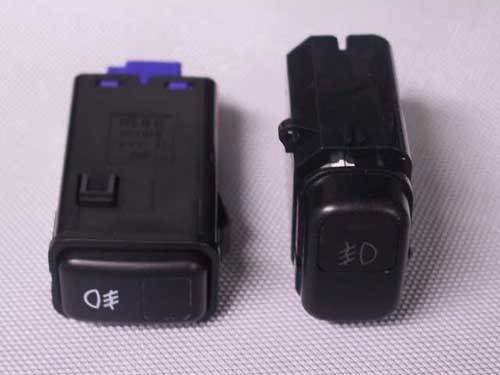
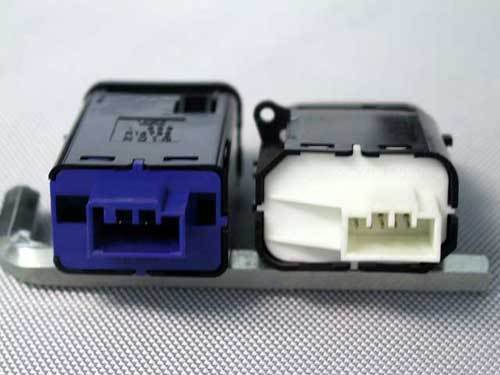
Here are two photos that compare the USDM (left) and JDM (right) switches. No modifications to the switches are required. These photos are for your reference only. This main difference with the two switches is the orientation. The JDM switch resides vertically, while the USDM switch resides horizontally. The fog light icon on the JDM switch lights up with your dash lights while the USDM one does not. The rear of the switches also have different shaped Molex plugs. They are almost the same which makes the modification simple.
switch

switch

Step one: Locate the green Molex on your JDM interior harness. If you have previously installed the JDM switch, you will have the remove the switch cluster containing the fog light switch. Use a flathead screwdriver wrapped with a shop towel to do this. Then remove all the Molexes from their switches. Do not remove the harness from your car as it is not necessary for this modification. (I took this photo when I was modifying my friend's harness).
switch

Step two: Remove the electrical tape holding the wire loom to the wires. Use a pair of sharp scissors or a knife to remove about an inch and a half of the wire loom.
switch

Step three: There are five wires running into the green Molex. Cut the second and fourth wires.
switch

Step four: Use wire strippers to remove the insulation, and expose about a quarter of an inch of the copper wire four each of the four ends. Then use a crimping to crimp the connectors onto the wire. Make sure that the connectors are attached tightly.
switch

Step five: Connect the connectors inversely, male of wire four to female of wire two and male of wire two to female of wire four. If you ever choose to use your JDM switch again, simply reverse the connectors again. Then wrap some electrician's tape around the connectors to hold them securely. Also tape the loom to the wires. This completes the wiring part.
switch

Step six: Now you have to trim one of the tabs of the green Molex for it to fit into the USDM switch Molex plug. With the tabs facing up and the connection end (not the wire end) facing towards you, you need to trim the rightmost tab. You can use a sharp knife or a rotary tool to do this. Simply trim the fat part of the right tab away as per the photo. Do this slowly so that you do not over cut. Test fit the Molex to ensure that it fits into the USDM switch.
switch

Step seven: Remove all your switches from the original bezel (switch holder). Then install the cruise control, sunroof and dimmer switches (from left to right) and the USDM fog light switch and blank plug cover into the new switch holder. Then connect all the Molexes to their corresponding switches and install the new switch holder. Your modification is now complete.
switch
Thanks to Jacob Ung for permission to use this info.


--- This how to courtesy of Wayne aka edge2lyfe ---


Store


Engine
Engine


Exhaust
Exhaust


Exterior
Exterior


Interior
Interior


Misc
Misc.


Suspension
Suspension


Wheels
Wheels
About           Terms           Privacy           Contact

Copyright © 2007-2024 - eXtremePrelude.com - All Rights Reserved.