
|
|

We Ship Worldwide! 

Secure Shopping Cart by Excellent eBay feedback! 
|
How to: Replace Fuel FilterJust replaced my fuel filter and wow! What a difference. My fuel filter was original, 6 years old with 67K miles through it and was due! Now the car revs smoother throughout the power band with no mild stumbling...I'm convinced it's because my fuel pressure is no longer fluctuating. New Copper plugs and new Honda distributor cap and rotor probably helped as well. The car also idles better. Good maintenance FTW! Fuel filter was pricy, $30 from Honda but I think it was well worth it. For those who have not yet replaced their fuel filter you should look into it. I did it myself and it was a lot easier than I was afraid it would be. Tools required: 1. 14mm open end wrench 2. 19mm open end wrench 3. 17mm socket wrench with long extension and swivel extension 4. It helps to have small, strong hands to reach the filter! 5. Shop towel 6. Crow bar (may be helpful) 7. 10mm socket wrench with short extension Sorry I didn't do a picture write up of this but here's the procedure: (Disconnect the Negative (-) battery terminal first) 1. Open the gas cap. 2. Wrap a shop towel around the fuel line where it attaches to the fuel rail (it's a 17mm nut), break it loose with the socket wrench with the towel around it to absorb the fuel that releases (it's not much). 3. Remove the little black bracket that holds the throttle cable up. 4. Remove the little white plug that plugs into the bottom of the throttle body. 5. Feel with your fingers the bottom of the fuel filter, find the 14mm nut on the bottom of it, use the 14mm open end wrench to loosen it (you will have to turn it clockwise from above the car to be turning it the correct way). If it's tight, pry on the wrench handle with the crowbar, I used the throttle body to pry off of and it broke the nut loose easily. 6. Wrap the shop towel under the filter and loosen the bottom 14mm nut the rest of the way, fuel will run out into the towel. 7. Use a 17mm socket with extension and swivel to loosen the 17mm nut on the top of the filter and remove the bolt and the 2 washers. 8. Remove the 10mm bolt that holds the fuel filter clamp. 9. Remove the fuel filter. 10. Install new filter and start threading in the 14mm nut on the lower fuel line first. 11. Install the 10mm bolt that holds the filter clamp down, it may be helpful to use a set of channel locks to compress the clamp and then thread in the 10mm bolt by hand until it catches the threads. 12. Install the upper fuel line with 2 new washers and tighten to 25 ft lbs. 13. Tighten the 14mm nut on the bottom of the fuel filter to 25 ft lbs. 14. Tighten the pressure release nut on the fuel rail to 20 ft lbs. 15. Reinstall the bracket that holds the throttle cable and reconnect the white connector on the throttle body. 16. Reconnect the battery, Start the car and check for fuel leaks. Note: it helps to leave the ignition in the "ON" position for 10 seconds before starting the car with the new filter to help fuel pressure build back up in the fuel rail. We sell authentic OEM Honda fuel filters here |
Store 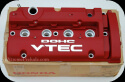
Engine 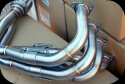
Exhaust 
Exterior 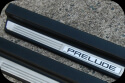
Interior 
Misc. 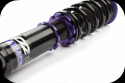
Suspension 
Wheels |
|
About Terms Privacy Contact
Copyright © 2007-2025 - eXtremePrelude.com - All Rights Reserved. |