
|
|

We Ship Worldwide! 

Secure Shopping Cart by Excellent eBay feedback! 
|
Innovative Motor Mount Install and ReviewThis article is a review/recommended install of Innovative motor mounts for 5th gen Preludes. I wanted to install these for my Prelude because I got really used to the race car feel of the Hasport solid billet mounts installed in my old B16A Civic, which I had to sell. :( Driving around with stock mounts was just straight boring. This motor mount set came with 3 mounts, rear, transmission, driver side (front mount is not included). The ones I bought had a durometer rating of 85A and I love the way they feel. Although I got the 85As, I'd probably recommend 60A or 75A for a mildly modified Prelude, due to comfort. They are kind of harsh when engaging 1st gear but other than that, I was very pleased with their performance and drivability. When I first installed them, they were harsh but after a week or so of driving, they started to break in. The idle vibration is not annoying at all and being able to feel the engine accelerate and decelerate was very much worth it. I know a lot of people had trouble installing these mounts which is the reason for this article. Please read through the whole article before you proceed to remove the old mounts and install the new ones. These mounts have the same design as the stock mounts with the exception of the driver side mount (I will explain why a little later). Assuming you want to install these mounts with the engine and transmission inside the car, it is no doubt best to do it one by one, but what order is best? I know some people got these mounts to fit perfectly, while others had trouble getting the bolts on the last mount to line up correctly. Most of the people who had no trouble installing these mounts are the ones who installed them with the engine and transmission out of the car. This is the 'true' recommended way to install them, but if you don't have the time/money/tools to do this, then the only way to upgrade your mounts is to install them with the engine and transmission in the car. *Note that I did this install without touching the oem front mount. It might actually be easier to install the new mounts by taking the oem front mount off as it will further increase the mobility of the engine. The set of 3 Innovative mounts are durable enough to the point where you no longer need the oem front mount, but you can keep it in place as I did. You can purchase and install the optional Innovative front mount if you'd like, but I assure you it is completely unnecessary, unless you have something along the lines of a 750+ hp H22 motor, which is quite difficult to achieve even if you're pushing 20+ lbs of boost and have it fully built with a godly tune. Before I start, I am going to give you a list of the bolts that you should replace, along with the quantity and Honda part numbers, as well as the tools recommended to perform this installation. You can reuse your old bolts but if they look rusty, it is recommended that you replace them. They are very cheap. The numbers in the parentheses below are the quantity that you will need, followed by the part numbers, followed by where they will go. Recommended Parts:For Rear Mount-Flange Bolt 12x101 (1) 90165-SM4-020 *Note: This bolt will go through the bracket and into the mount. -Flange Bolt 12x25 (1) 90182-S2H-000 *Note: This bolt will go into the chassis. (center) -Trailing Arm Bracket Bolt 12x47 (2) 90175-SZ3-010 *Note: These bolts will go into the chassis. (left and right) For Transmission Mount -Flange Bolt 12x113 (1) 90161-S30-000 *Note: This bolt will go into the bracket and through the mount. -Flange Bolt 12x30 (3) 95701-12030-08 *Note: These bolts will go into the chassis. For Driver Side Mount -Flange Bolt 10x25 (2) 95701-10025-08 *Note: These bolts will go into the chassis (front and rear) -Flange Bolt 10x45 (1) 95701-10045-08 *Note: This bolt will go into the chassis (right) -Flange Bolt 12x45 (1) 90170-S30-000 *Note: This bolt will go into the rear hole on engine bracket. -Flange Nut 12mm (1) 94050-12080 *Note: This nut is optional. You can reuse your old nut. This nut will go into the front bolt sticking up from the engine bracket. Recommended Tools:-Jacks and/or Lift-Crowbar or prying tool -10mm socket wrench with long and swivel extension -12mm socket wrench with long and swivel extension -12mm open end wrench The best order to install these mounts is rear 1st, transmission 2nd, and driver side last. The reason why you want to install the driver side mount last is within the design. The driver side mount has a bracket that provides it extra mobility. This mobility will give you leeway in lining up the bolts after installing the first 2 mounts. ALWAYS bolt the new engine mounts into the chassis first, but DO NOT tighten the bolts all the way. Starting with the rear mount (located right below the intake manifold). This mount is the hardest to reach so it would only be logical to install it first. You'll want to start by disconnecting the negative terminal on your battery (a recommended step whenever doing work in the engine bay). Don't forget to get your radio code if you're using your stock radio. Then you want to jack the car up (or lift if you're lucky) and put a jack or two underneath the engine. You can lower the jacks/lift [not the one(s) under the engine] a little bit to relieve the pressure of the engine on the chassis. Now remove your intake pipe. If you have big arms and hands, it is recommended you remove the intake manifold as well. Now remove the bolts on the rear mount and take it out. With the other 3 oem mounts installed, the aftermarket rear mount should line up perfectly. Install the rear mount (DO NOT tighten the bolts going into the chassis all the way, DO tighten the bolt going from the bracket through the mount all the way). Now you'll want to move on to the transmission mount (located right behind the battery). Take your battery and battery case out first, then proceed to remove this mount and install the new one (once again, DO NOT tighten the bolts going into the chassis all the way, DO tighten the bolt going from the bracket through the mount all the way). Onto the last mount (driver side). Remove the old mount and bracket and save 1 of the 2 nuts you removed to reuse with the new mount (unless you ordered a new one). You will not need the bracket you removed because the new mount is designed to be installed without it. With the other 2 mounts installed and the bolts not tightened all the way and the last mount having the moving bracket, you should be able to easily line up the bolts for the last mount. If you're still having trouble, try using a crowbar or pipe of some sort to pry the engine around or loosen the bolts that weren't tightened a little bit more. Now put the nut and bolts into the driver side mount and tighten them all the way. Now tighten the bolts on the other 2 mounts, starting with the rear mount, then the transmission mount. Put your intake manifold back on (if you decided to take it out), then put your battery back in. As a safety precaution, don't put the terminals back on until after you put your intake pipe back in. Now plug the terminals back on your battery, positive terminal first of course. Good luck! I hope this review/install helps anyone interested in upgrading to Innovative mounts for their H22 5th gen Prelude. Please feel free to leave any questions or comments. Thanks for reading and I hope you enjoy these mounts as much as I do. =) |
Store 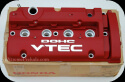
Engine 
Exhaust 
Exterior 
Interior 
Misc. 
Suspension 
Wheels |
|
About Terms Privacy Contact
Copyright © 2007-2024 - eXtremePrelude.com - All Rights Reserved. |