


We Ship Worldwide!


Secure
Shopping Cart by

Excellent eBay feedback!


|
How to: Timing Belt Procedure!
First things first: This write-up is intended solely as guidance for those skilled enough to attempt a job of this level themselves. Just because I did it does not mean you can! I'm an engineer and have a lot of experience working on cars otherwise I would never attempt this job myself. That said it is still a medium level job as far as tools required and degree of difficulty. It is a very time consuming job and some parts can be very tedious and having small hands is almost required for certain things!
I don't mean to scare you guys away but just so you are aware...there is a reason that shops charge $350 - $800 just for the labor on this job!
TIPS:
- Have a shop break your crank pulley bolt loose first! Without EagleEyez's shop I would have been in some trouble!
- You'll need at least a full weekend dedicated to this job if you've never done something like this before.
- Make sure you take your time. This is a pretty critical job that if messed up...could spell disaster for your motor!
- Label all parts removed, especially bolts and nuts as to where they go! I use ziploc bags stored in a 5 gallon bucket to keep anything from happening to them! That can be one of the most frustrating things...to lose a 10 cent bolt that prevents you from finishing the job!
Download the helms service manual to cover the procedure for the T-belt job: www.extremeprelude.com/info
For the manual tensioner conversion you NEED all these parts:
13404-PT0-004 - ADJUSTER COMP., BALANCER BELT
13415-PT0-000 - BRACKET, BALANCER BELT ADJUSTER
14510-PT0-004 - ADJUSTER COMP., TIMING BELT
14516-PT2-000 - SPRING COMP., TIMING BELT ADJUSTER
14521-P14-A00 - PLATE, ADJUSTER
90014-P14-A00 - BOLT, TIMING BELT ADJUSTER BASE
90015-PT0-000 - BOLT, TIMING BELT ADJUSTER SPRING
90016-PT0-000 - BOLT, TIMING BELT ADJUSTER
90140-P14-A00 - WASHER, PLAIN (11MM)
OR
Auto tensioner
Part #: 14520-P13-013
NOTE: Only auto tensioners are needed for a normal t-belt job. Manual tensioners require modification and more parts (listed above).
Other parts needed for the job are below (required parts and recommended parts):
For the complete timing belt job you need to replace the auto tensioner either with a new one and a new pulley or with the manual tensioner kit. You also need the following to do the full job:
Timing belt
Part #: 14400-P13-014
Balance shaft belt
Part #: 13405-PT0-004
Water pump
Part #: 19200-P13-003
Main shaft (crank) seal
Part #: 91212-PAA-A01
It's recommended to also replace these while you are at it:
New balance shaft seal
Part #: 91233-PT0-003
Balance seal retainer
Part #: 06923-P0A-306
Cam seals
Part #: 91213-PR3-004
Power steering belt
Part #: 56992-PDE-E01
A/C compressor/alternator belt
Part #: 38920-P0F-J01
Valve cover gasket set
Part #: 12030-P13-000
We sell authentic OEM Honda Timing belt kits here as well as oil seals and Gates timing belt components
Alright, here we go...
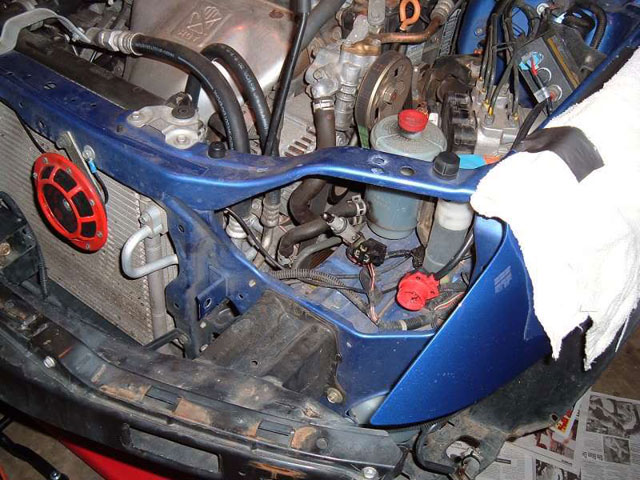
1. I removed the bumper cover and headlight to make it easier to work.
- Drain the motor oil into a clean container and save for later reuse.
- Drain the coolant into a clean container and save for later reuse.
- Disconnect the battery negative (-) black terminal.
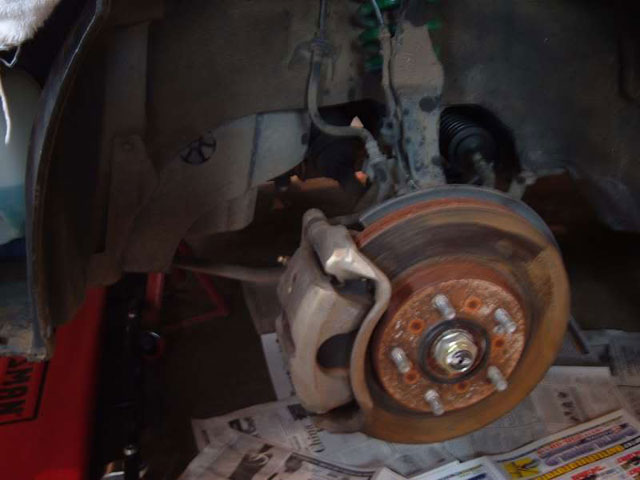
I also covered the fender with a terry towel to protect it. Then raise the front of the vehicle on jack stands and remove the driver side wheel:
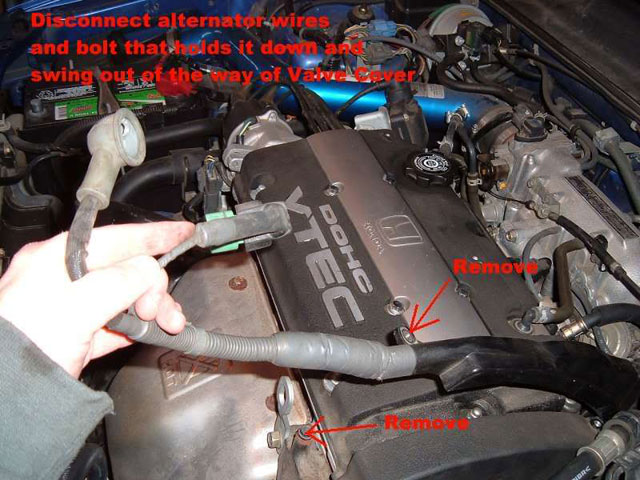
2. You can start by disconnecting the alternator wires and swinging them out of the way:
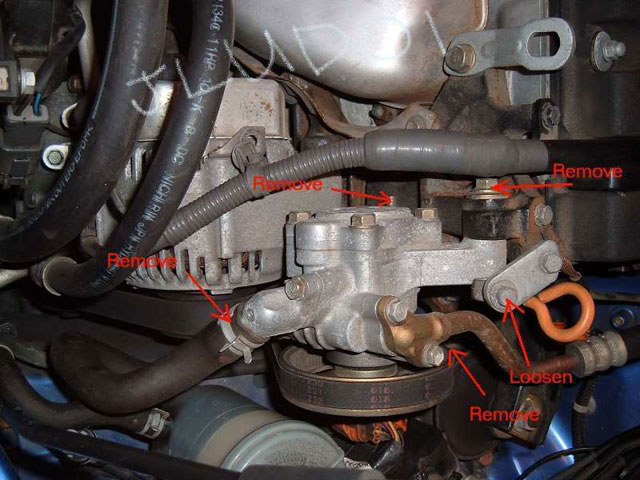
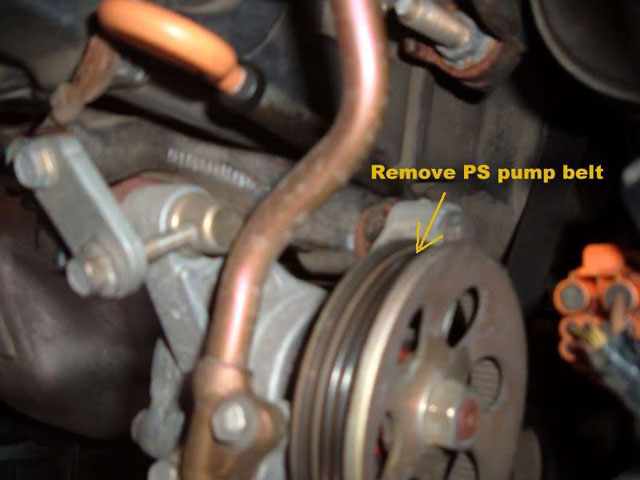
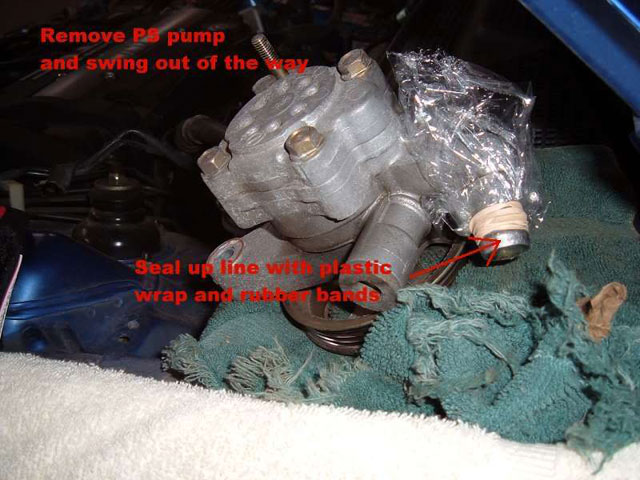
3. Next we will remove the power steering pump:
*Note: Do NOT remove the metal line that goes into the top of the PS pump! Just leave it attached and the pump will swing out of the way just fine.
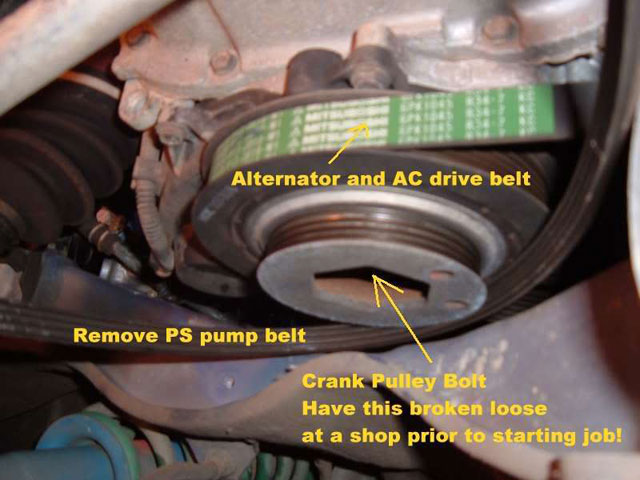

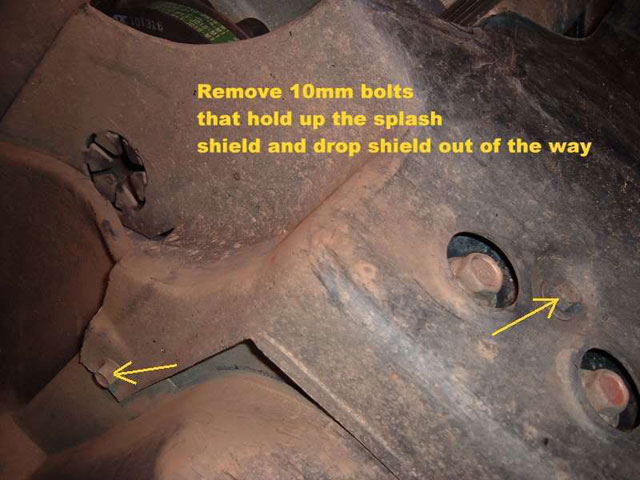
4. Next remove the splash shield from the crank pulley end.
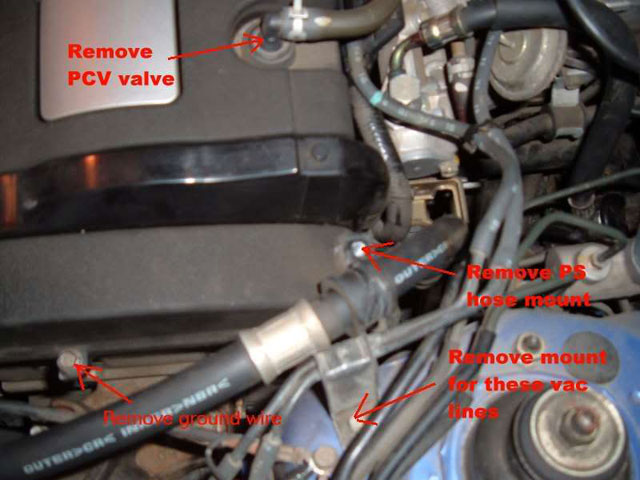
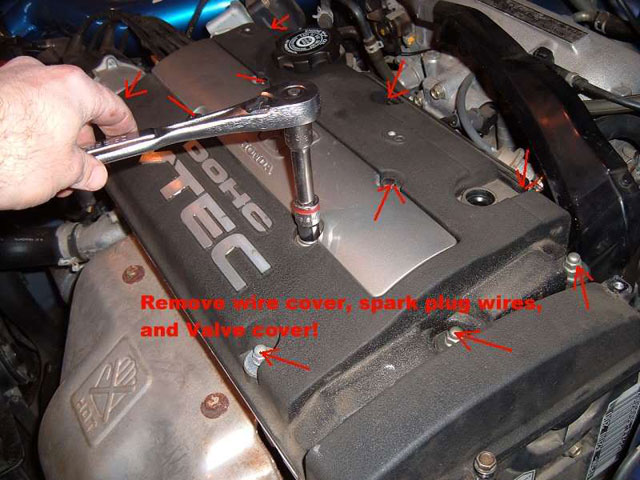
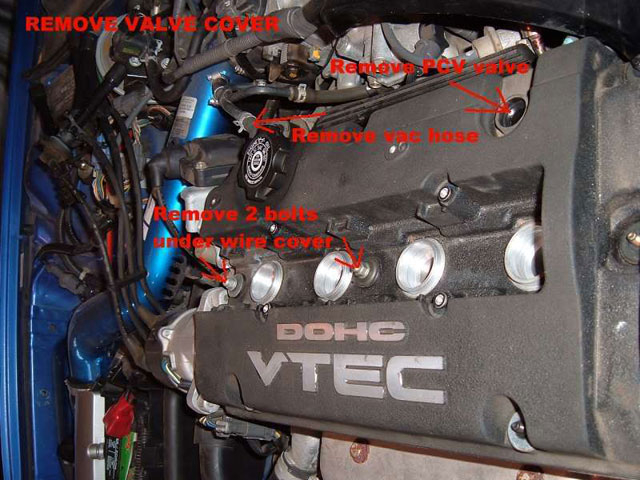
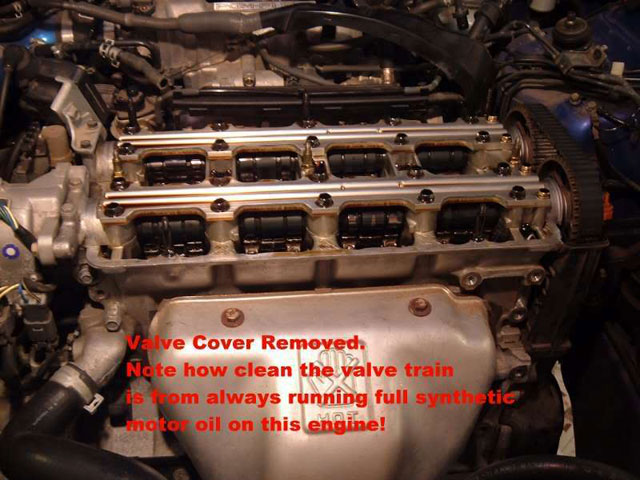
5. Remove the spark plug wires and valve cover:
6. Remove alternator:
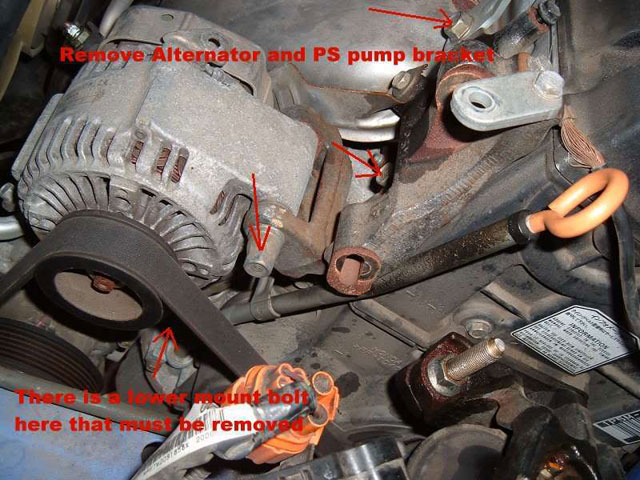
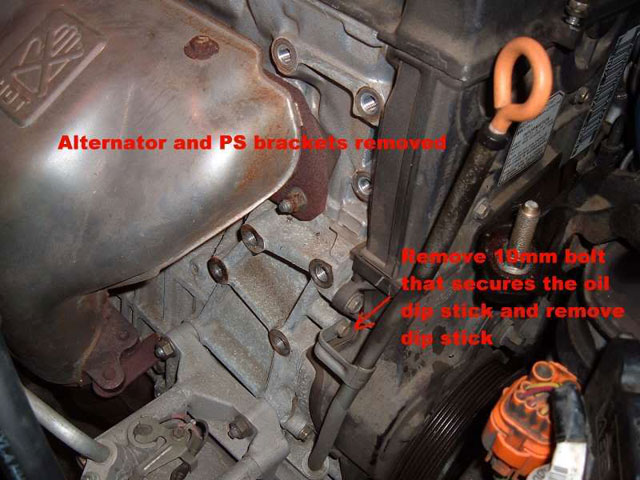
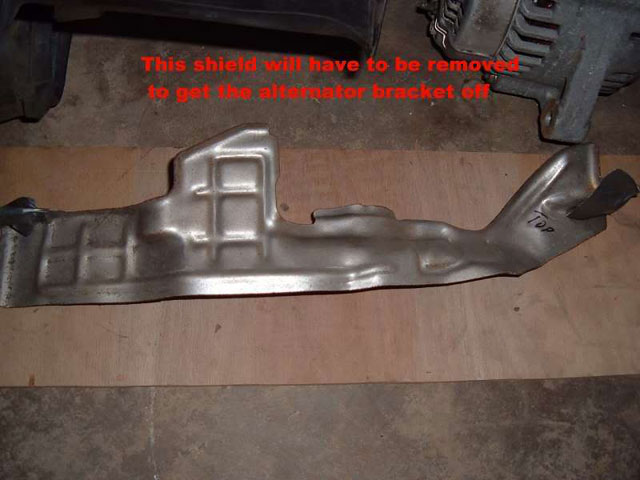
7. Remove Alternator and PS pump brackets:
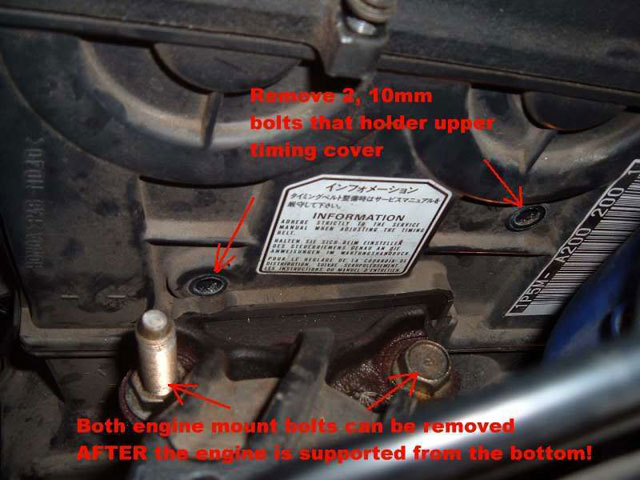
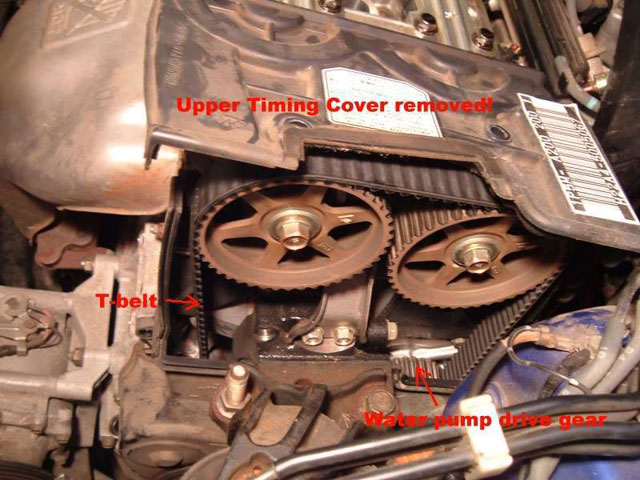
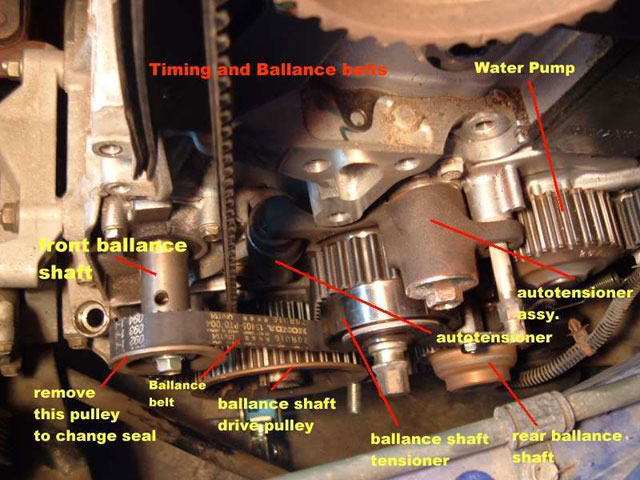
8. Remove upper timing cover:
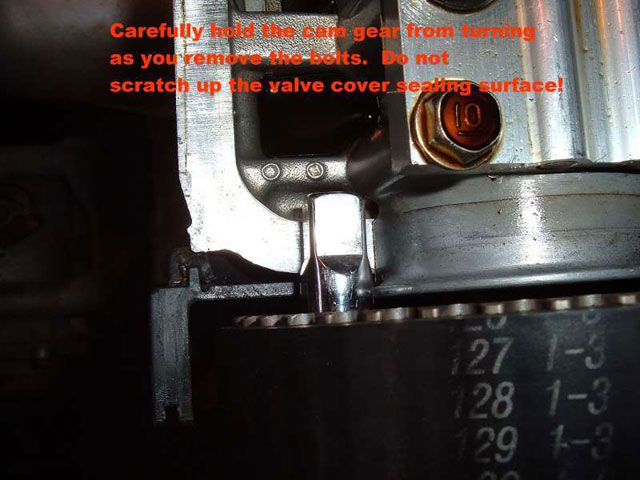
9. Loosen the Cam Gears if you plan to replace the cam seals:

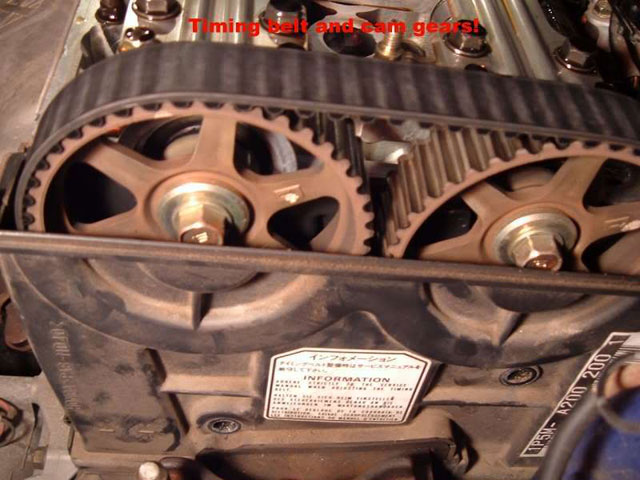
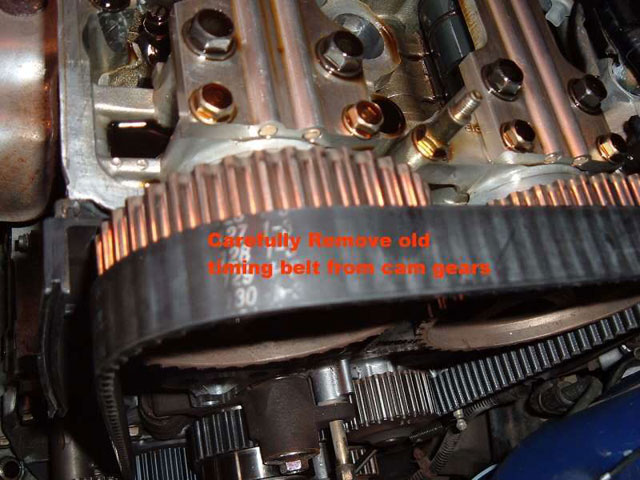
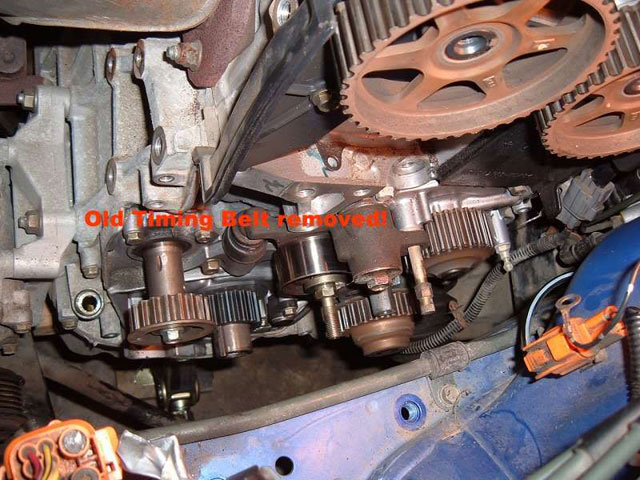
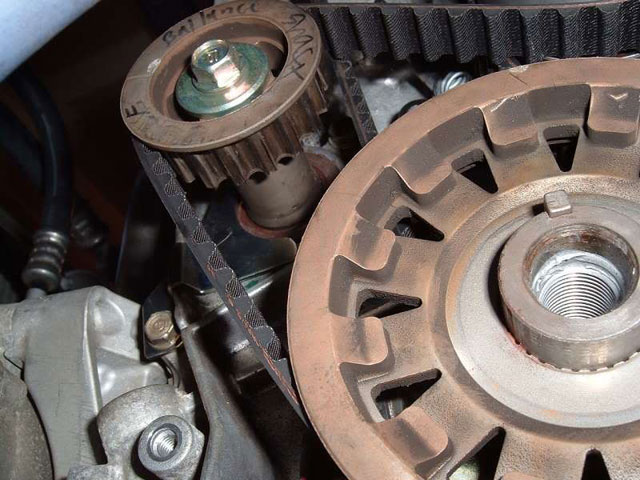
10. Remove timing belt from the cam gears:

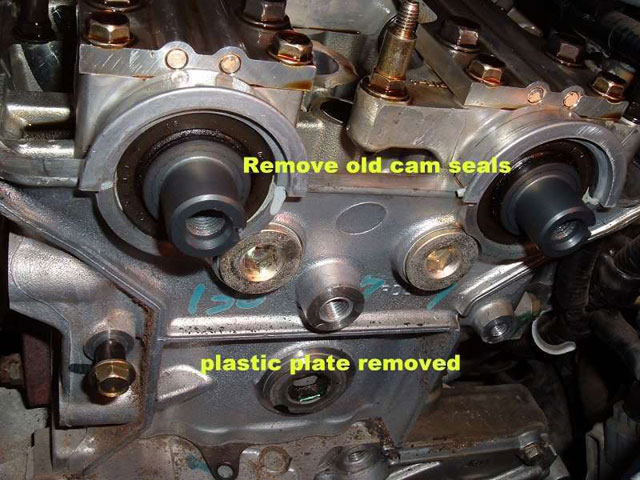
11. Remove under cam plastic plate and remove old cam seals:

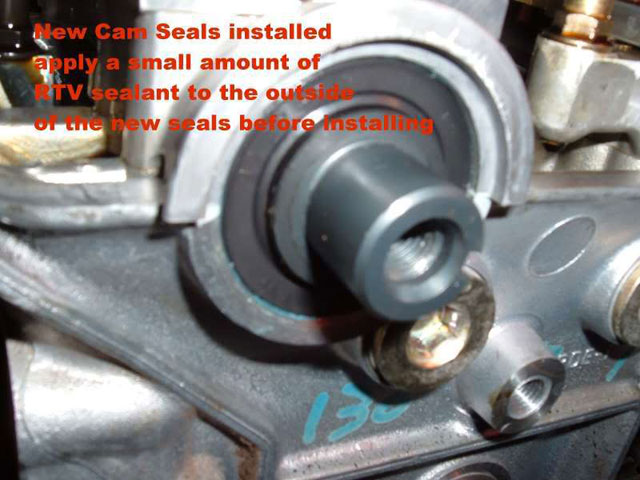
12. Install new cam seals:
13. Remove the lower timing cover. Keep in mind that there is a wire loom on the back side of it that connects to the crank sensors...you must disconnect this wire from the cover first...take your time.
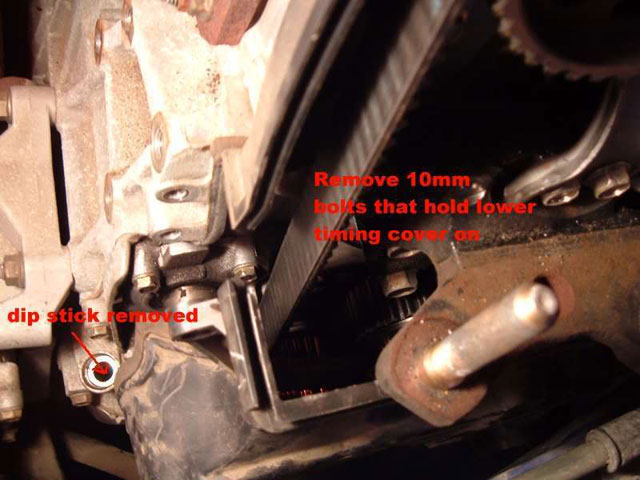
The crank pulley must be removed to free lower cover:
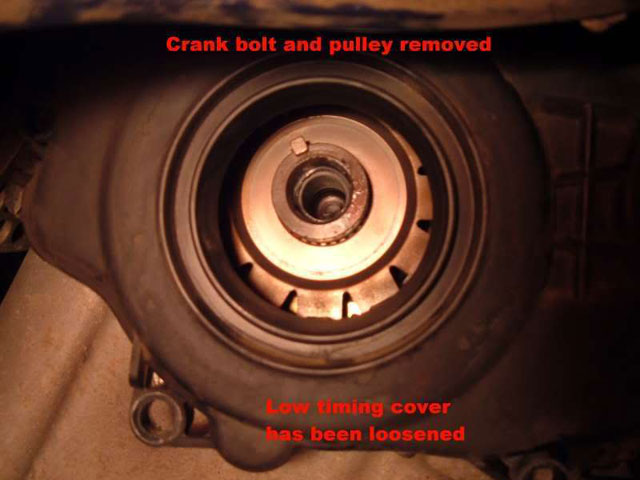
14. Lower cover out of the way:
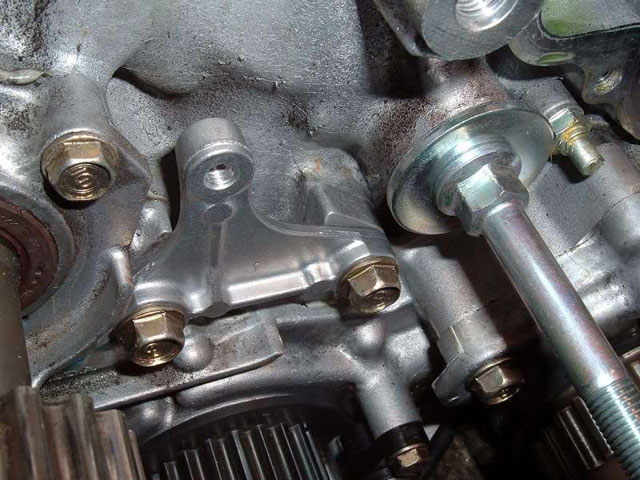
15. Remove the side engine mount:

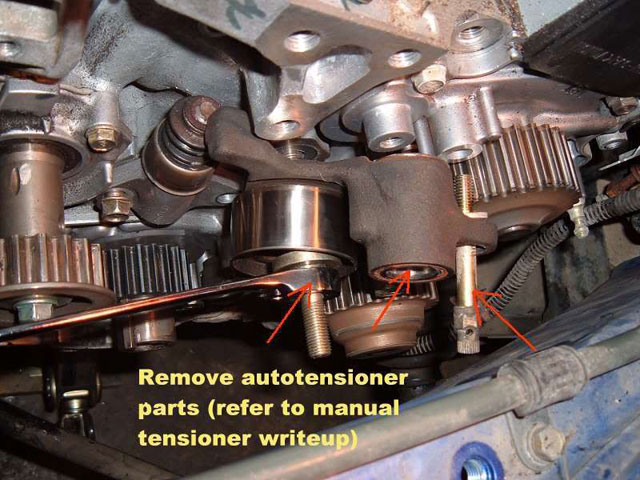
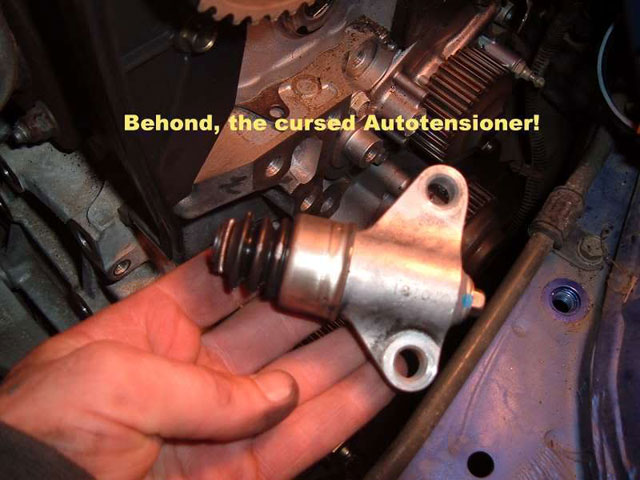
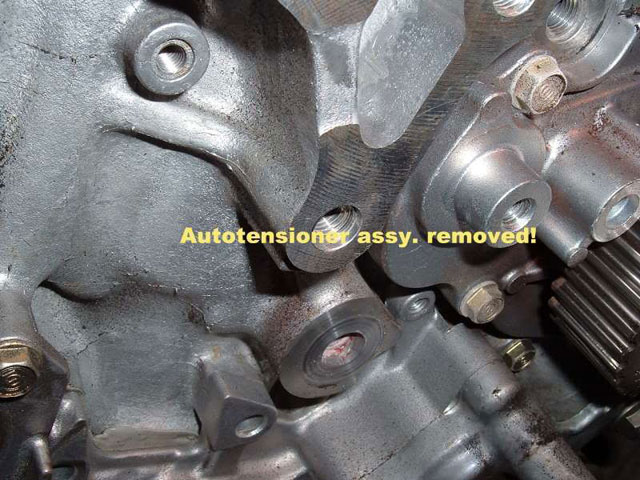
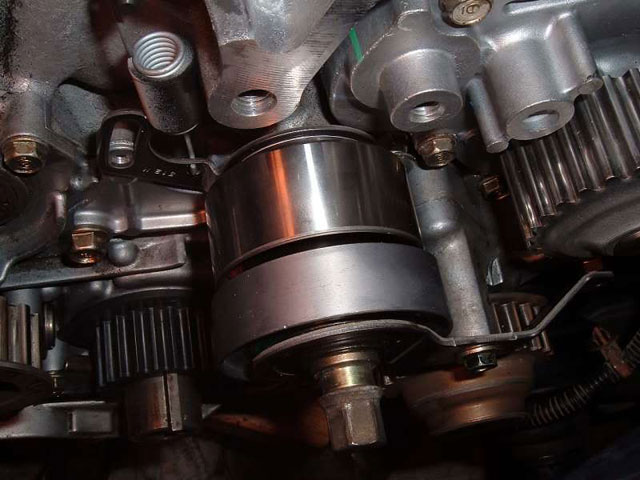
16. Remove the auto tensioner assy. (refer to the auto to manual tensioner swap write-ups)
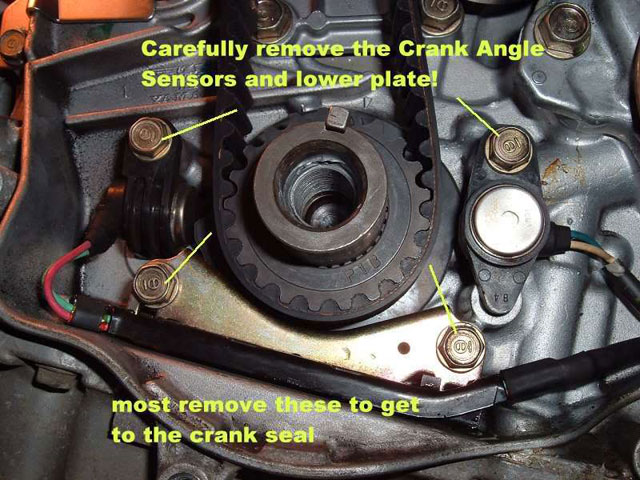
17. If replacing the crank shaft oil seal, remove the crank angle sensor assy. (4, 10mm bolts) and carefully remove the timing belt drive gear from the crankshaft. Remove the old crank shaft oil seal:
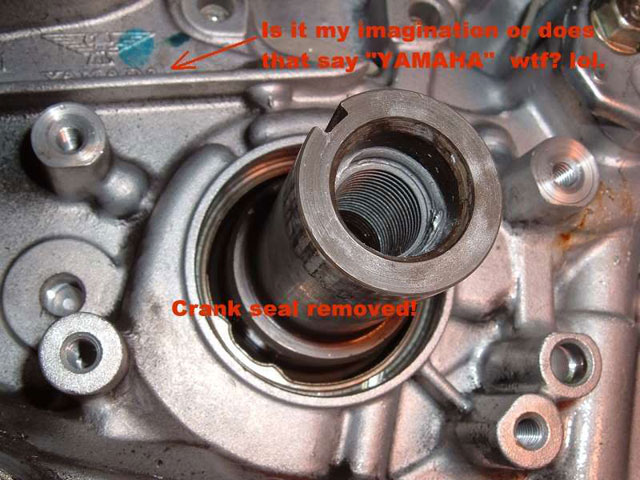
Replace with new crank shaft oil seal! Make sure it seats uniform...I used a small hammer and blunt tipped tapper
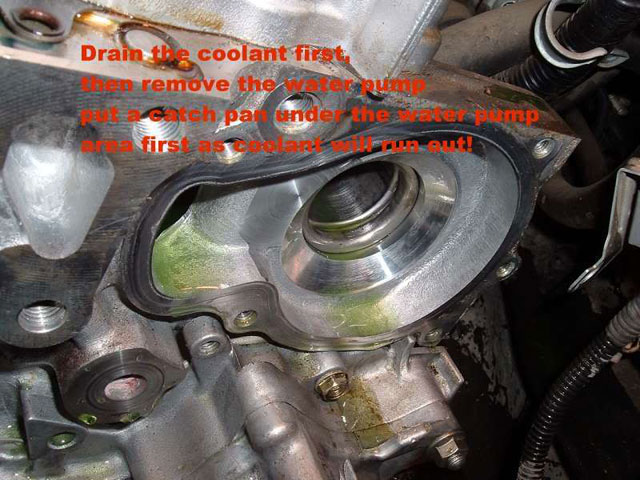
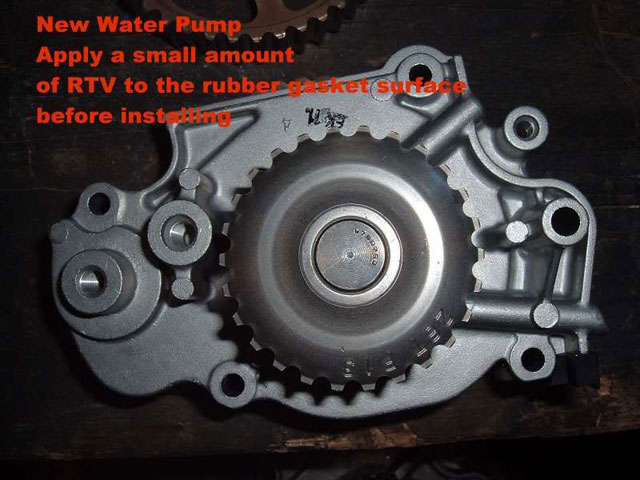
18. Remove old water pump and install new:
19. Install manual tensioner parts (see manual tensioner write-ups):
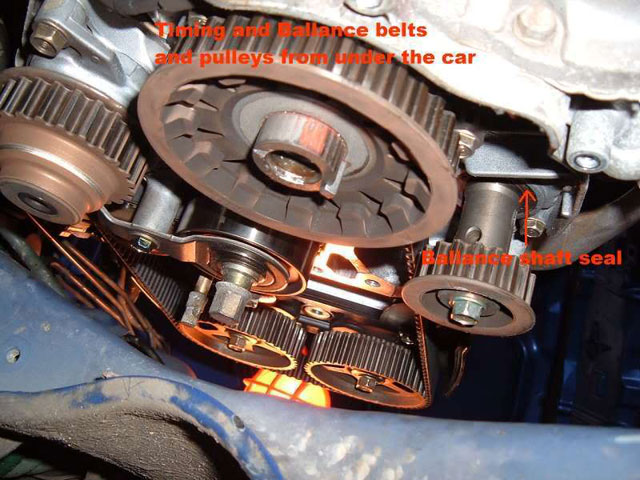
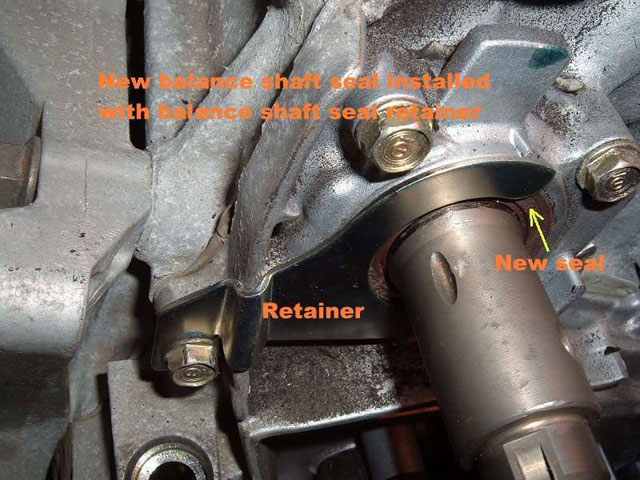
20. If replacing the balance shaft seal:
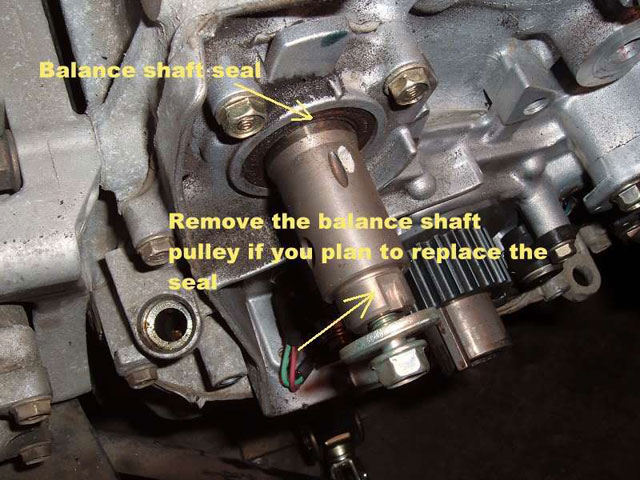
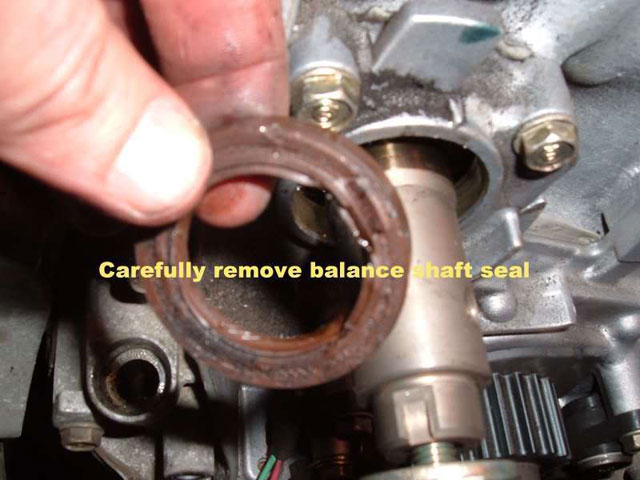
Be sure to install the balance shaft seal retainer!
21. Installing new Timing Belt:
Reinstall the plastic plate under the cam gears, then reinstall the cam gears.
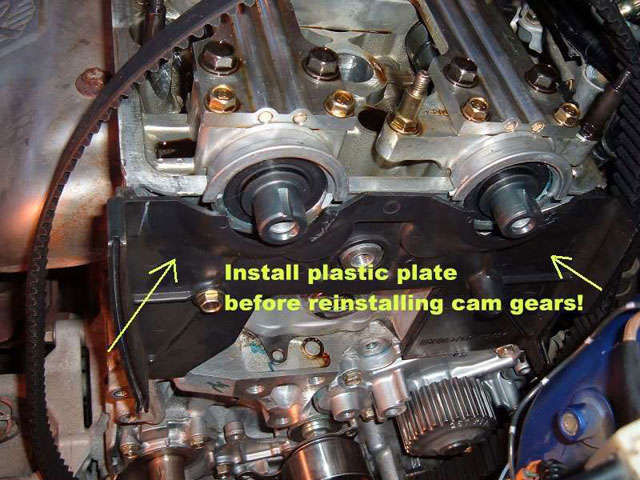
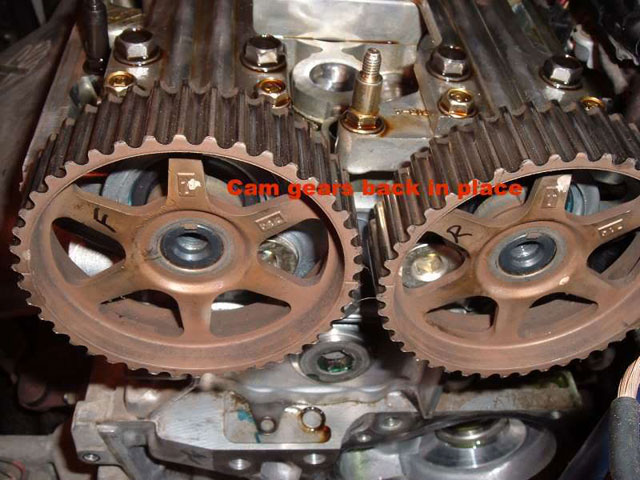
(yes I realize that in this pic the plastic plate isn't under the cam gears...lol)
Then hold and tighten each cam gear to the torque specified in the Helms manual
Place each cam gear at TDC according to the Helms Manual:
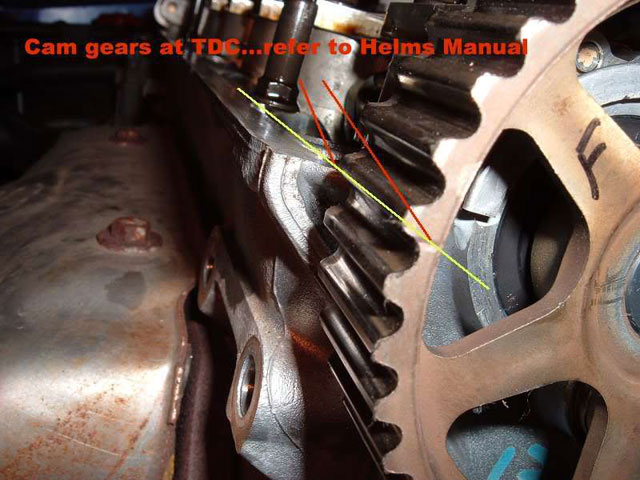
Put the crank timing belt drive pulley at TDC according to the Helms manual. There are little marks on it that must line up with the pointer.

Install the timing belt over the crank drive gear, be sure not to turn the crank shaft once set at TDC!
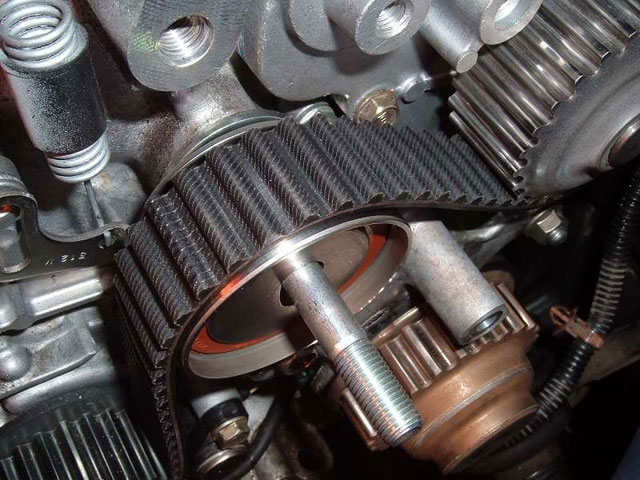
This is the tricky part: While keeping the cam gears at TDC, wrap the timing belt around the front gear and then the rear, use a zip tie to help you hold it in the correct position on the first cam gear while you work the belt over the water pump and tensioner pulley!

I had to pull the tensioner pulley off of its pivot point in order to get the timing belt over the pulley...yes it's going to be tight!
Once you are on, turn the engine counterclockwise using the crank pulley placed over the crank shaft and gloves to turn it. This is MUCH easier if you remove the spark plugs first:
Once you've turned the engine several revolutions recheck that the cam gears are both at TDC when the crank gear is at TDC...if they match up, you are good to go!
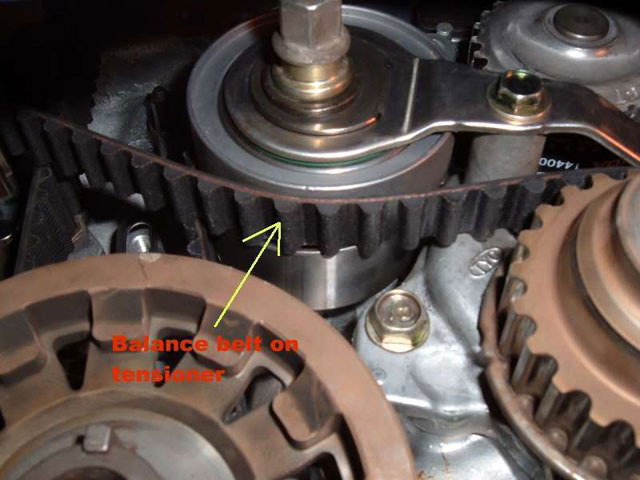
22. Install the balance belt. Follow the procedure in Helms to align the rear pulley. You will need a 100mm x 6mm bolt to insert in the maintenance hole at the back of the block to hold the rear balance shaft in the correct position while you install the new balance belt
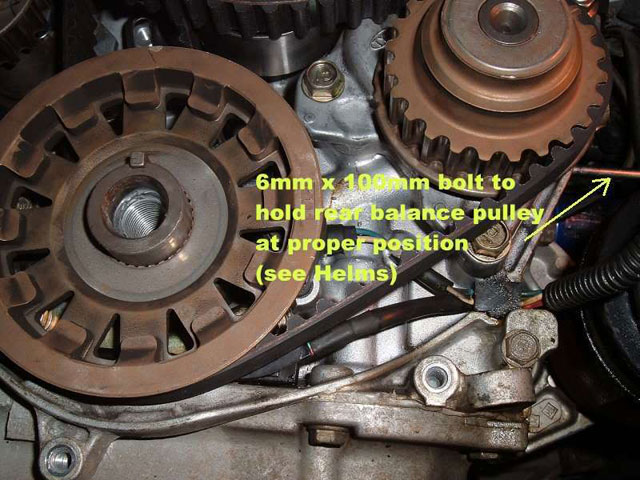
****There is a groove in the shaft of the front balance shaft that must line up with the pointer while you install the balance shaft belt. If it's off by one tooth you'll know it, the groove won't even be close to lining up with the pointer.
23. Set the correct tension on the timing belt and balance shaft belts!
I went by feel since I've done timing belts before. I found that the timing belt was just right with the tensioner as loose as it goes! The balance belt needed to be about half way between the tensioners travel from loose to tight to have the right deflection for me.
If anyone has the correct belt deflection numbers please share them!
Once you set the tension you must tighten the tensioner adjusting nut (14mm) to the correct torque and then tighten the small bolt that goes to the pivot arm. Turn the engine several revolutions counterclockwise by hand to be sure there is free movement.
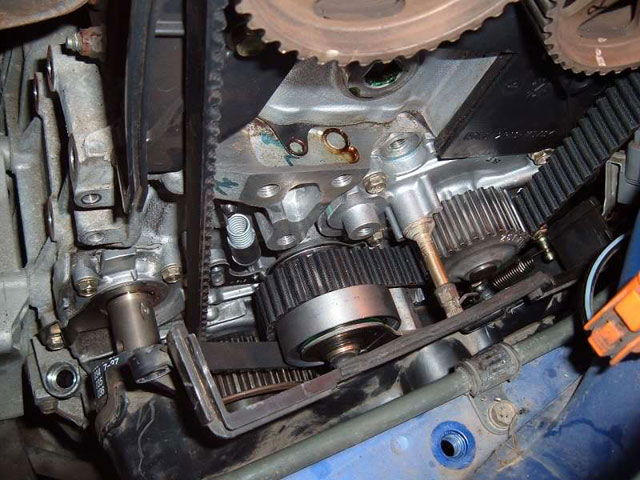
24. Reinstall the lower timing cover:
********First install the side engine mount!
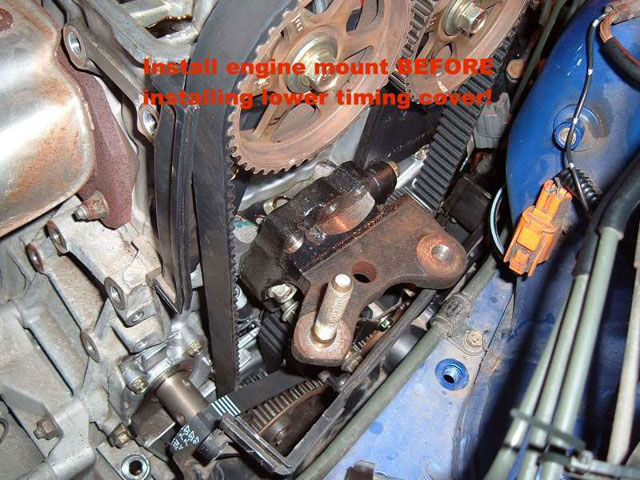
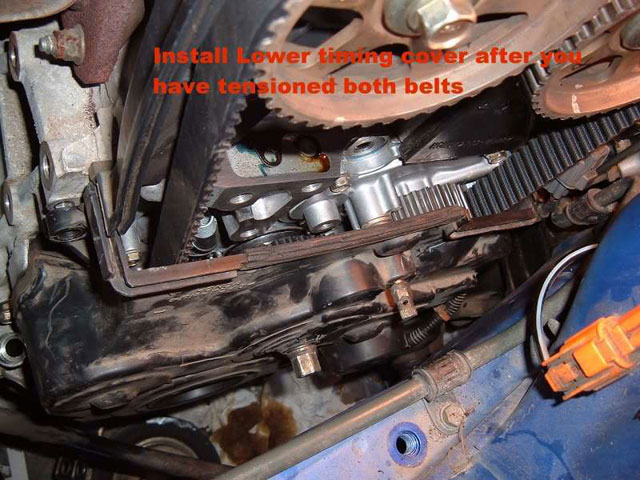
Note: one of these pics shows the lower cover with the engine mount off so you can see more detail.
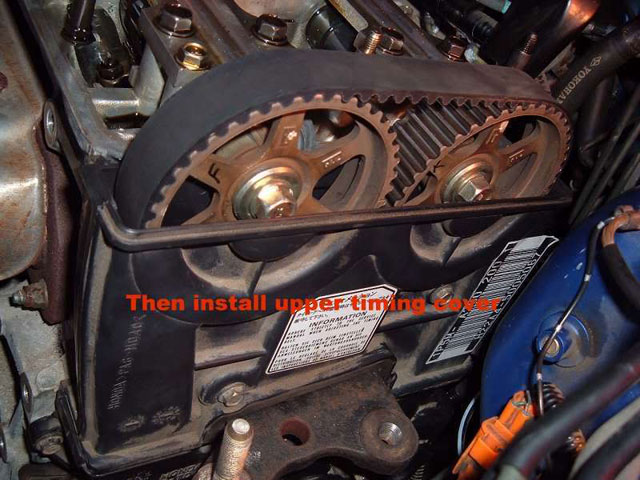
25. Reinstall the upper timing cover and the 2 rubber seals that go over the 2 adjuster bolts that go through the lower timing cover:
26. Reinstall the rest of the side engine mount
27. Reinstall the valve cover. Be sure to use a new gasket set for the valve cover or at least apply some RTV to the seals, especially the corners of the seals near the cam ends.
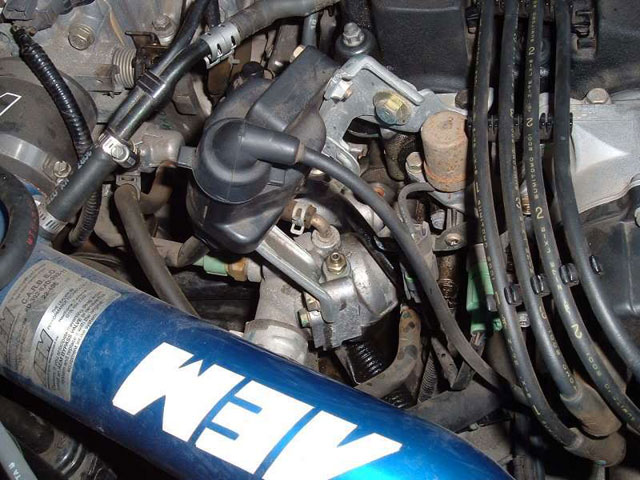
28. Reinstall the PS and alternator brackets, heat shield, alternator, PS pump and both drive belts.
29. Refill the motor oil.
30. Refill the coolant.
31. Reconnect anything else that may be disconnected (PS pump line, alternator wire loom, PCV valve, spark plugs and wires, etc. etc.). Use your best judgment to be sure everything is in order before starting the car!
32. Reconnect the battery Negative terminal.
33. Leave the radiator cap off
34. Open the coolant bleeder valve on the top of the thermostat:
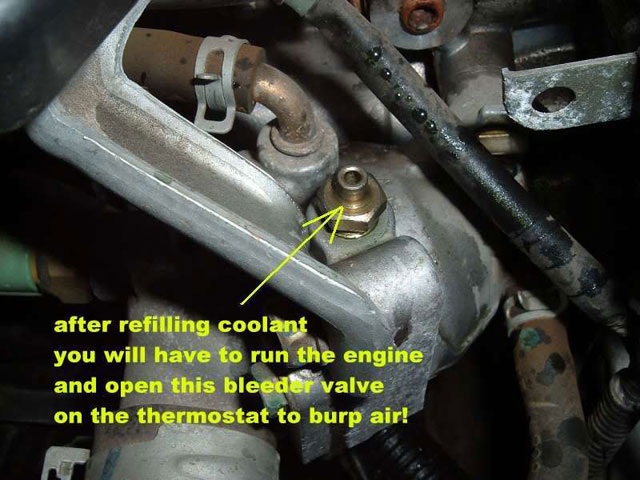
35. Start the car and make sure it feels and sounds right! If all is good, let it reach operating temperature and eventually coolant and air will start flowing from the coolant bleeder valve...once there is no more air, close the bleeder valve. Close the radiator cap. Turn the car off and let it cool down. Once cool, remove radiator cap and top off coolant level.
36. Check oil level and check for fluid leaks.
37. Torque your crank pulley bolt to 180 ft lbs! No, that's not a typo! It's best to use an impact torque wrench so as not to turn the engine backwards!
38. Test drive! =)
39. You did it! Now go have a brew and take a long nap! That was HARD WORK! You now know why they charge so much for the Full Timing belt job!
--- This how to courtesy of JLUDE ---
|
Store
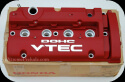
Engine
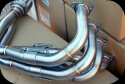
Exhaust

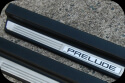
Exterior
Interior

Misc.
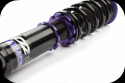
Suspension
Wheels
|
