|
|

We Ship Worldwide! 

Secure Shopping Cart by Excellent eBay feedback! 
|
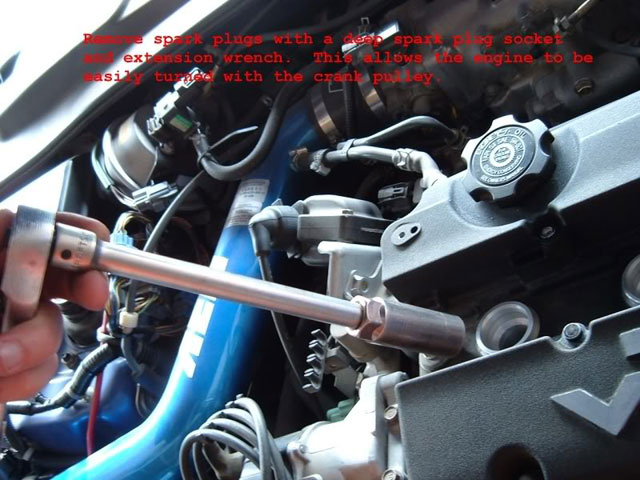
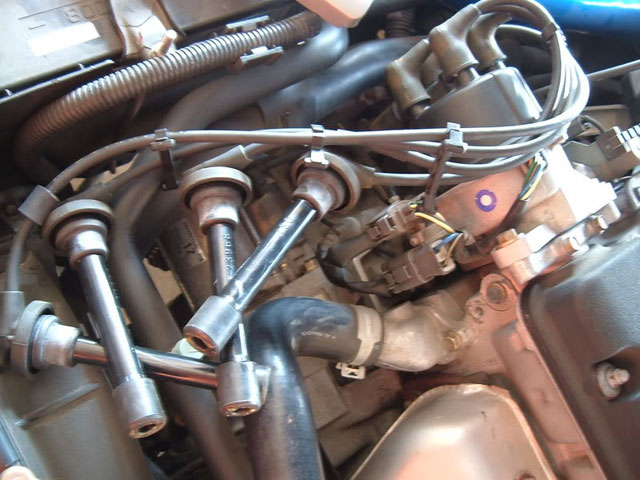
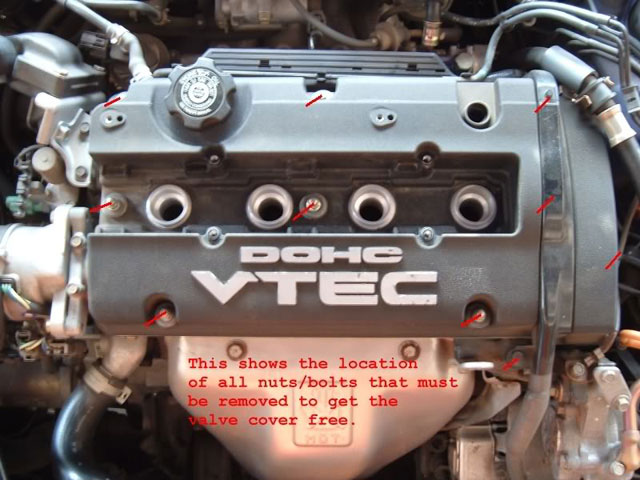
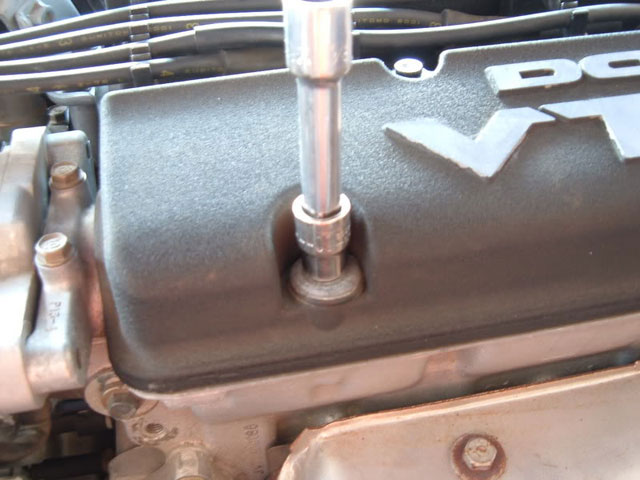
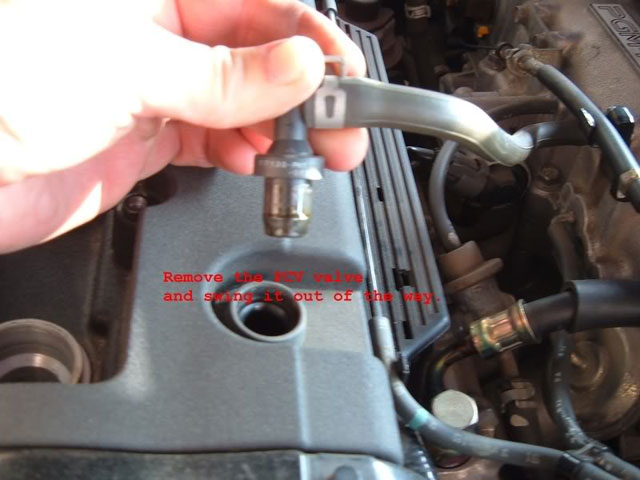
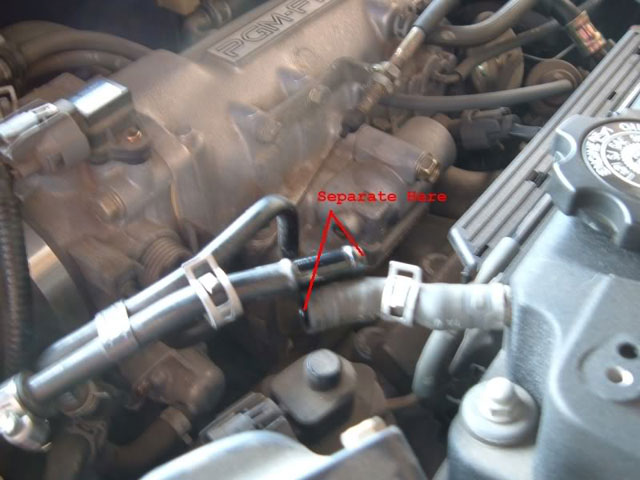
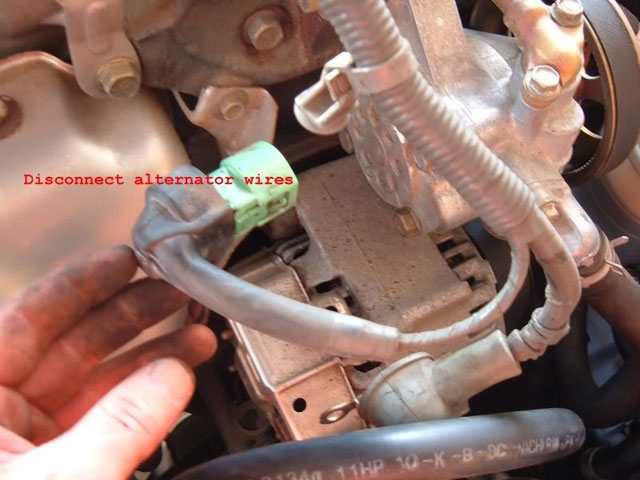
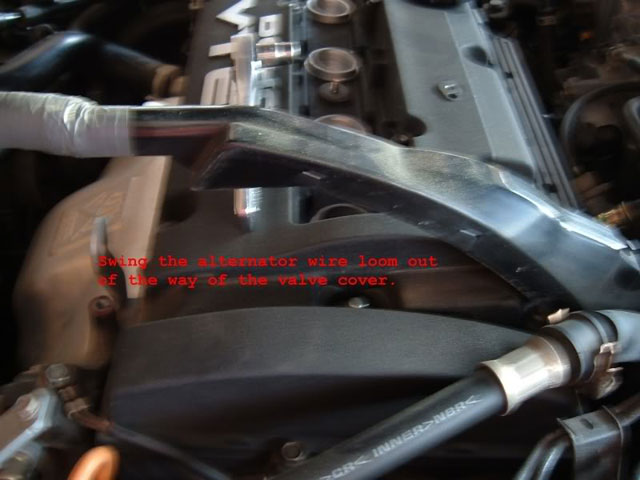
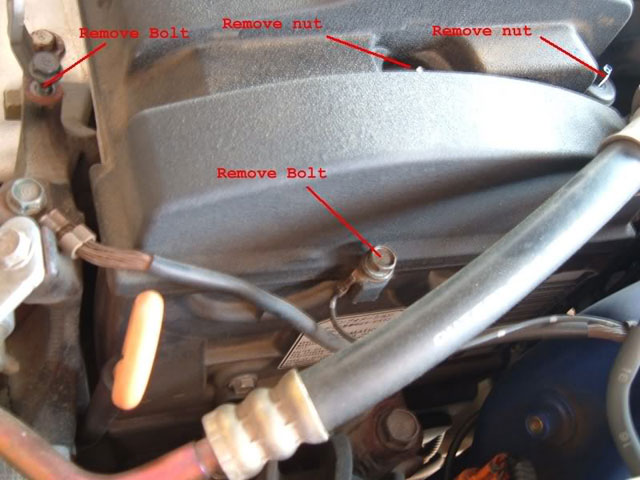
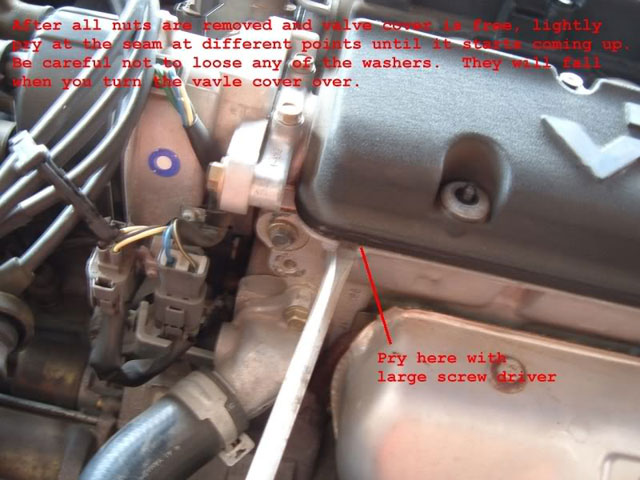
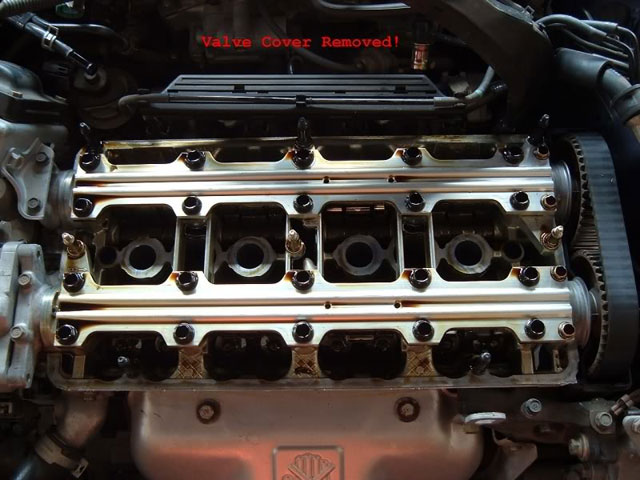
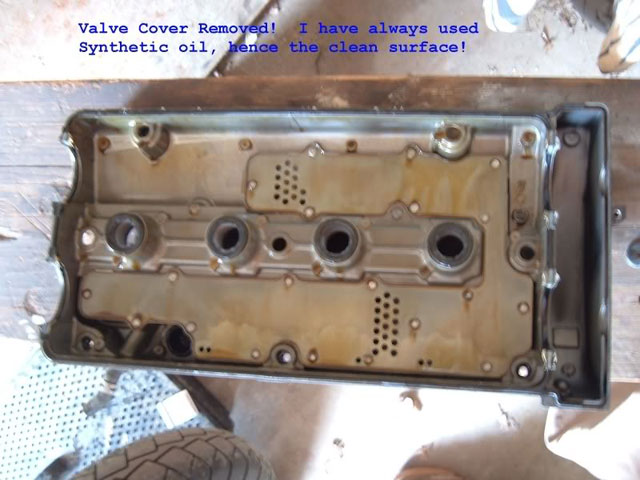
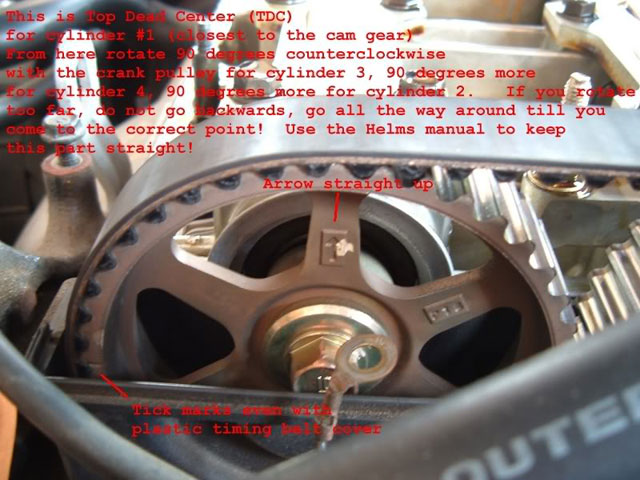
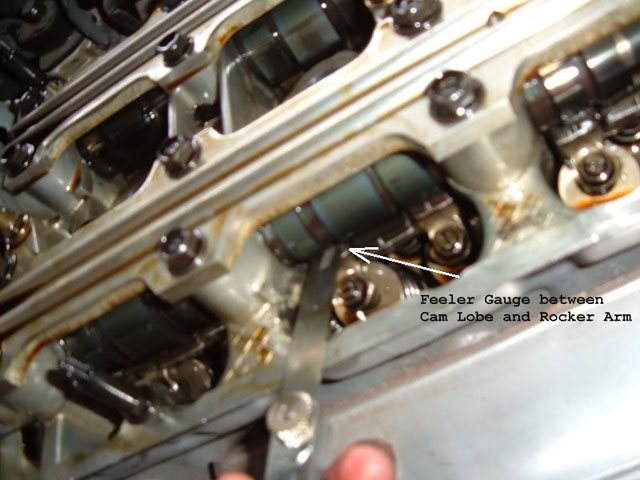
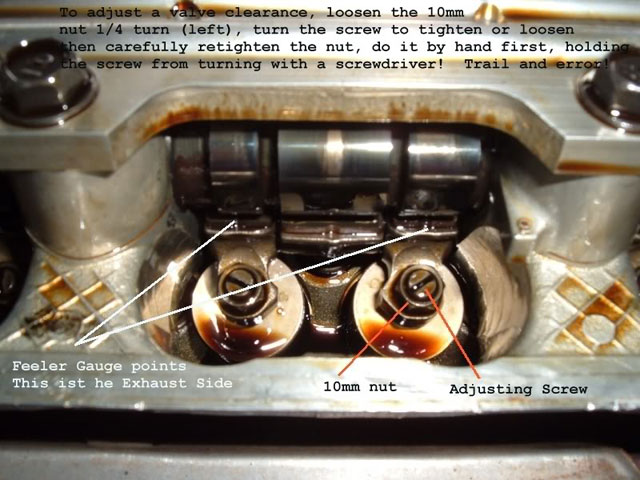
How to: H22A4 Valve AdjustmentAdjusted my valves on Saturday. First time for this motor (69K on the clock). Made a noticeable difference. The power band is smoother. I used to have some roughness between 4-4.5K rpms...that is totally gone now and the motor idles quieter! Here's the procedure: 1. Download the helms manual! www.extremeprelude.com/info 2. Disconnect the negative battery cable (closest to the front of the car) 3. Remove the Valve cover 4. Remove the spark plugs 5. Rotate the engine with the crank pulley bolt (19mm) according to the Helms manual to get each cylinder you're adjusting to TDC on the compression stroke. 6. Check and adjust the exhaust and intake valves on each cylinder at TDC, make sure you use a torque wrench to torque the valve nuts back down! 7. Intake valve clearance (0.15 - 0.19mm) 8. Exhaust valve clearance (0.17 - 0.21mm) Here's the pics!
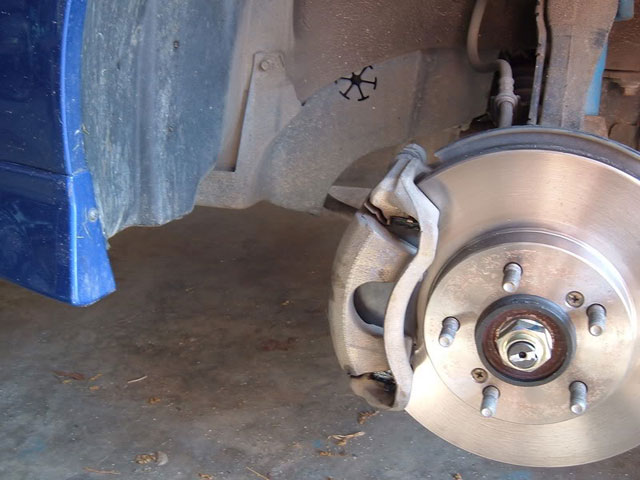
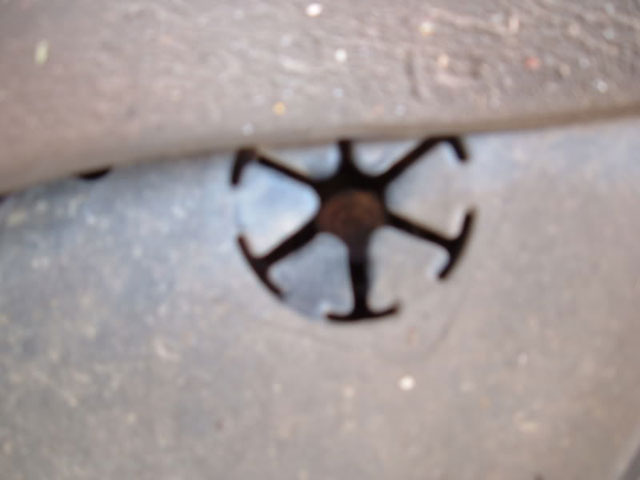
Step 1: Remove the driver side front wheel. That little hole is where you'll put your 19mm socket and extension to turn the engine counter clockwise (left).
|
Store 
Engine 
Exhaust 
Exterior 
Interior 
Misc. 
Suspension 
Wheels |
|
About Terms Privacy Contact
Copyright © 2007-2024 - eXtremePrelude.com - All Rights Reserved. |